click map Home Tutorials About FAQ
Showing posts with label upcycle. Show all posts

Tuesday, May 31, 2011

Upcycle: Shirt to Purse


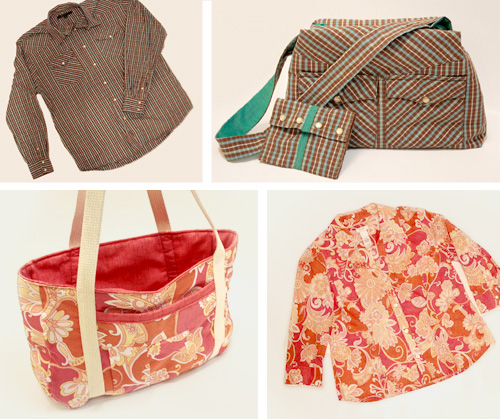
Some of you may recognize the top shirt/purse as my final project from One Month to Win It, a sewing/crafting contest that I won in April! I love the little details in clothing so I used those details in my purse patterns. You can find the pattern for the pink shirt/tote over at Craft Buds. I've uploaded a free PDF pattern* for this purse here. The pattern is 2 pages. You'll want to print both pages out, line up the dots and tape them together. For some reason, in my browser the PDF preview shows the pages are cropped but once I download it, it shows correctly.

For this bag you'll need:
  • one long-sleeved western style shirt
  • 1/2 yard fusible fleece
  • 1/2 yard fabric for the liner (I used a heavier weight home dec fabric)
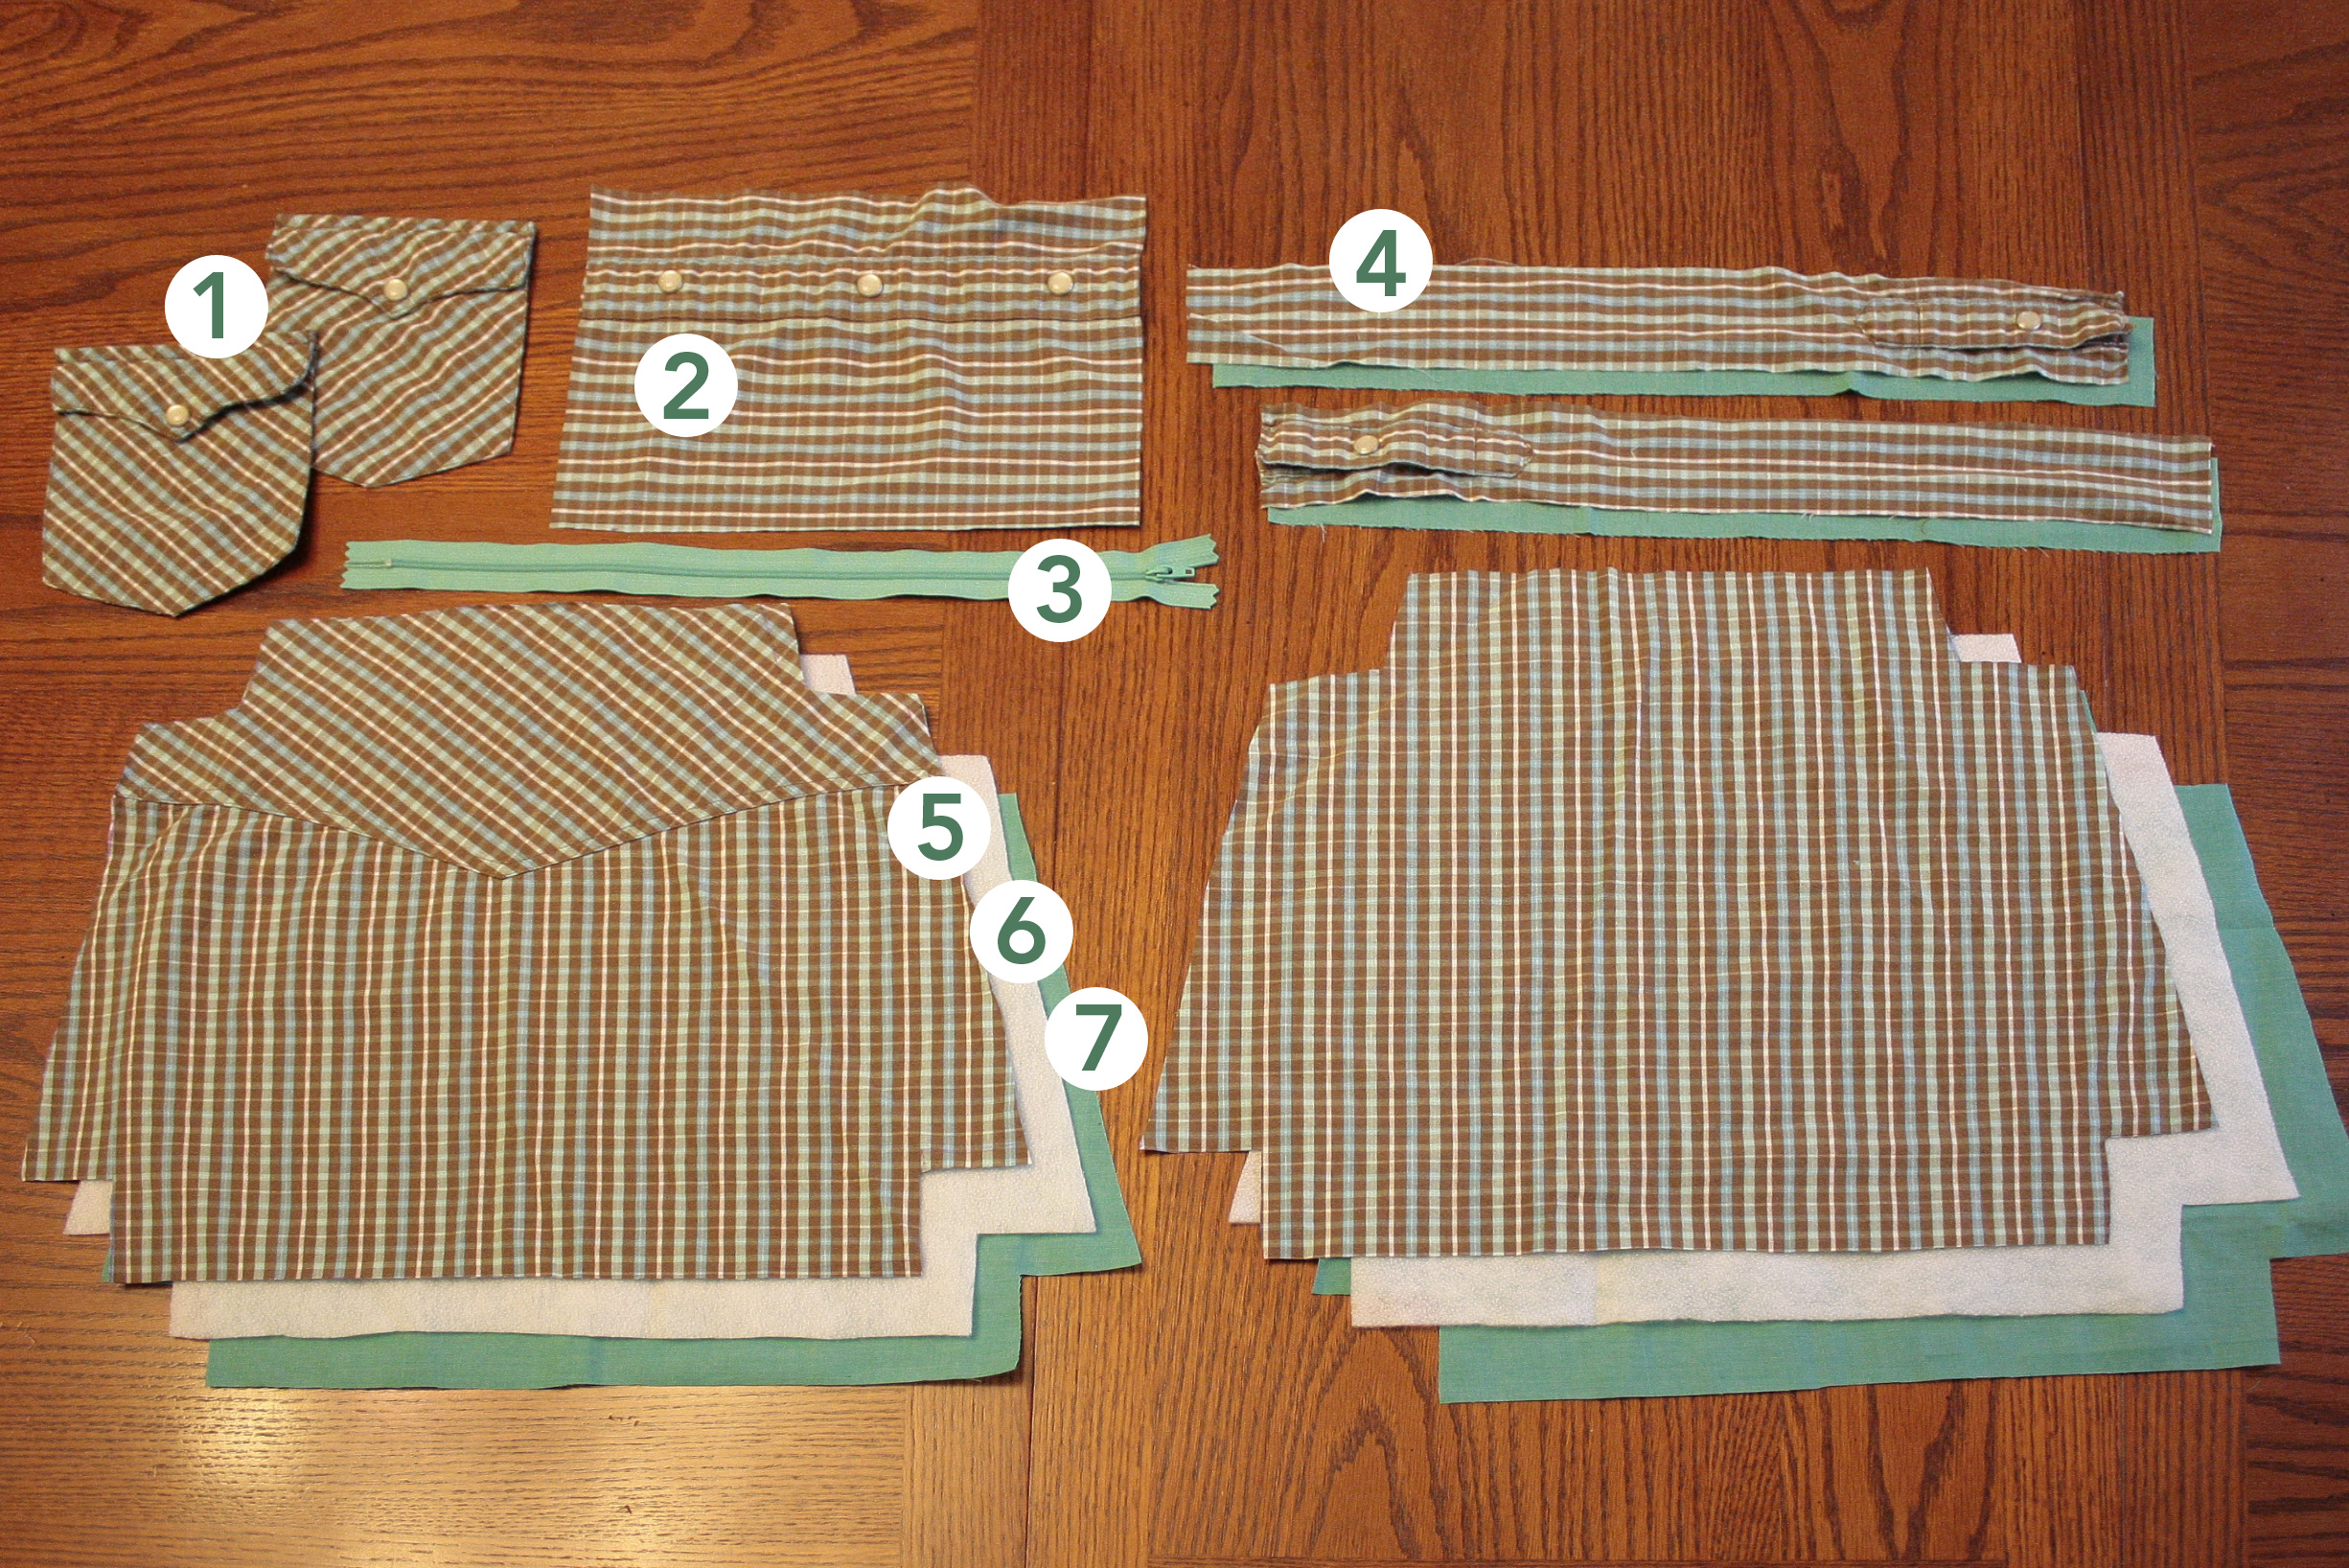
To get started, assemble all the pieces in the photo below including:
  1. Two pockets from the front of the shirt
  2. A 6 1/2" x 9 1/2" rectangle for the inner fabric including the buttons from the front of the shirt
  3. 12" (or longer) zipper
  4. Four strips total of 18" x 2 1/2" fabric, one strip cut from each of the two shirt sleeves including the button, and two strips from the liner fabric. (Using these measurements, the final sewn and attached strap will be around 34" long x 2" wide so feel free to adjust as necessary if you'd like a different length/width. If you're using a lighter weight fabric shirt and/or liner, you may want to add strips of the fusible fleece to the inside of the strap for extra reinforcement.)
  5. Use the pattern to cut pieces from the top back and lower back of the shirt for the main body of the bag.
  6. Use the pattern to cut two pieces of fusible fleece.
  7. Use the pattern to cut two pieces of the liner fabric.
  8. Save the cuffs for a wallet (pictured near the end of the post).
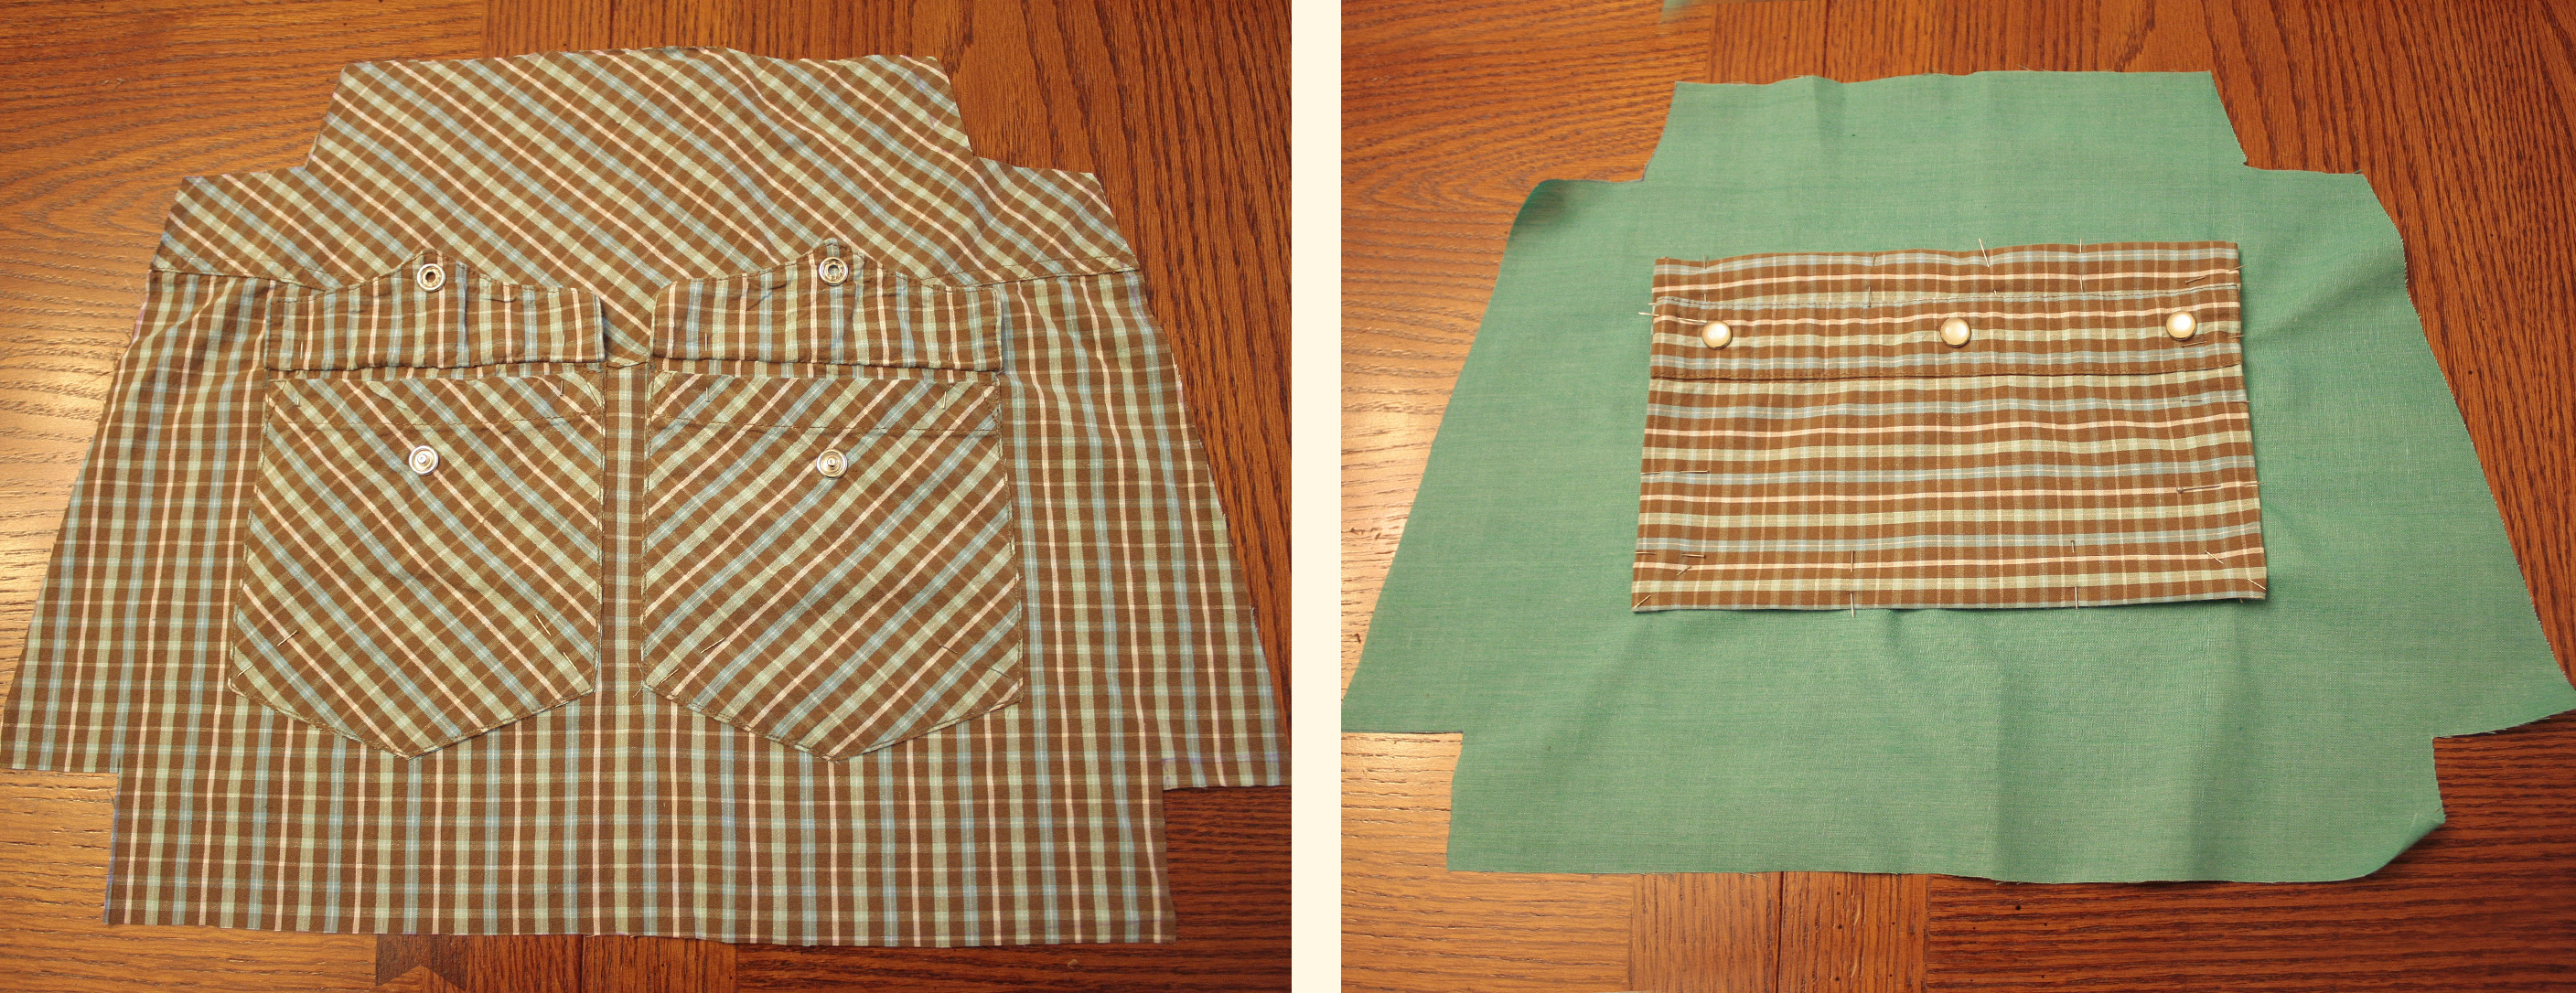
First you'll get the pockets ready. Sew the pockets to one of the exterior pieces (left photo). I sewed across the top, then pinned the flaps up and sewed the sides and bottom. For the inner pocket (right photo), hem the edges of the rectangle and sew it to one of the pieces of fabric for the liner.


Iron the fusible fleece to the shirt fabric. Iron the top of the piece down 3/8" to help later with the zipper installation. It's optional if you want to stitch it down.

Then with right sides together sew the bottom and sides shut.
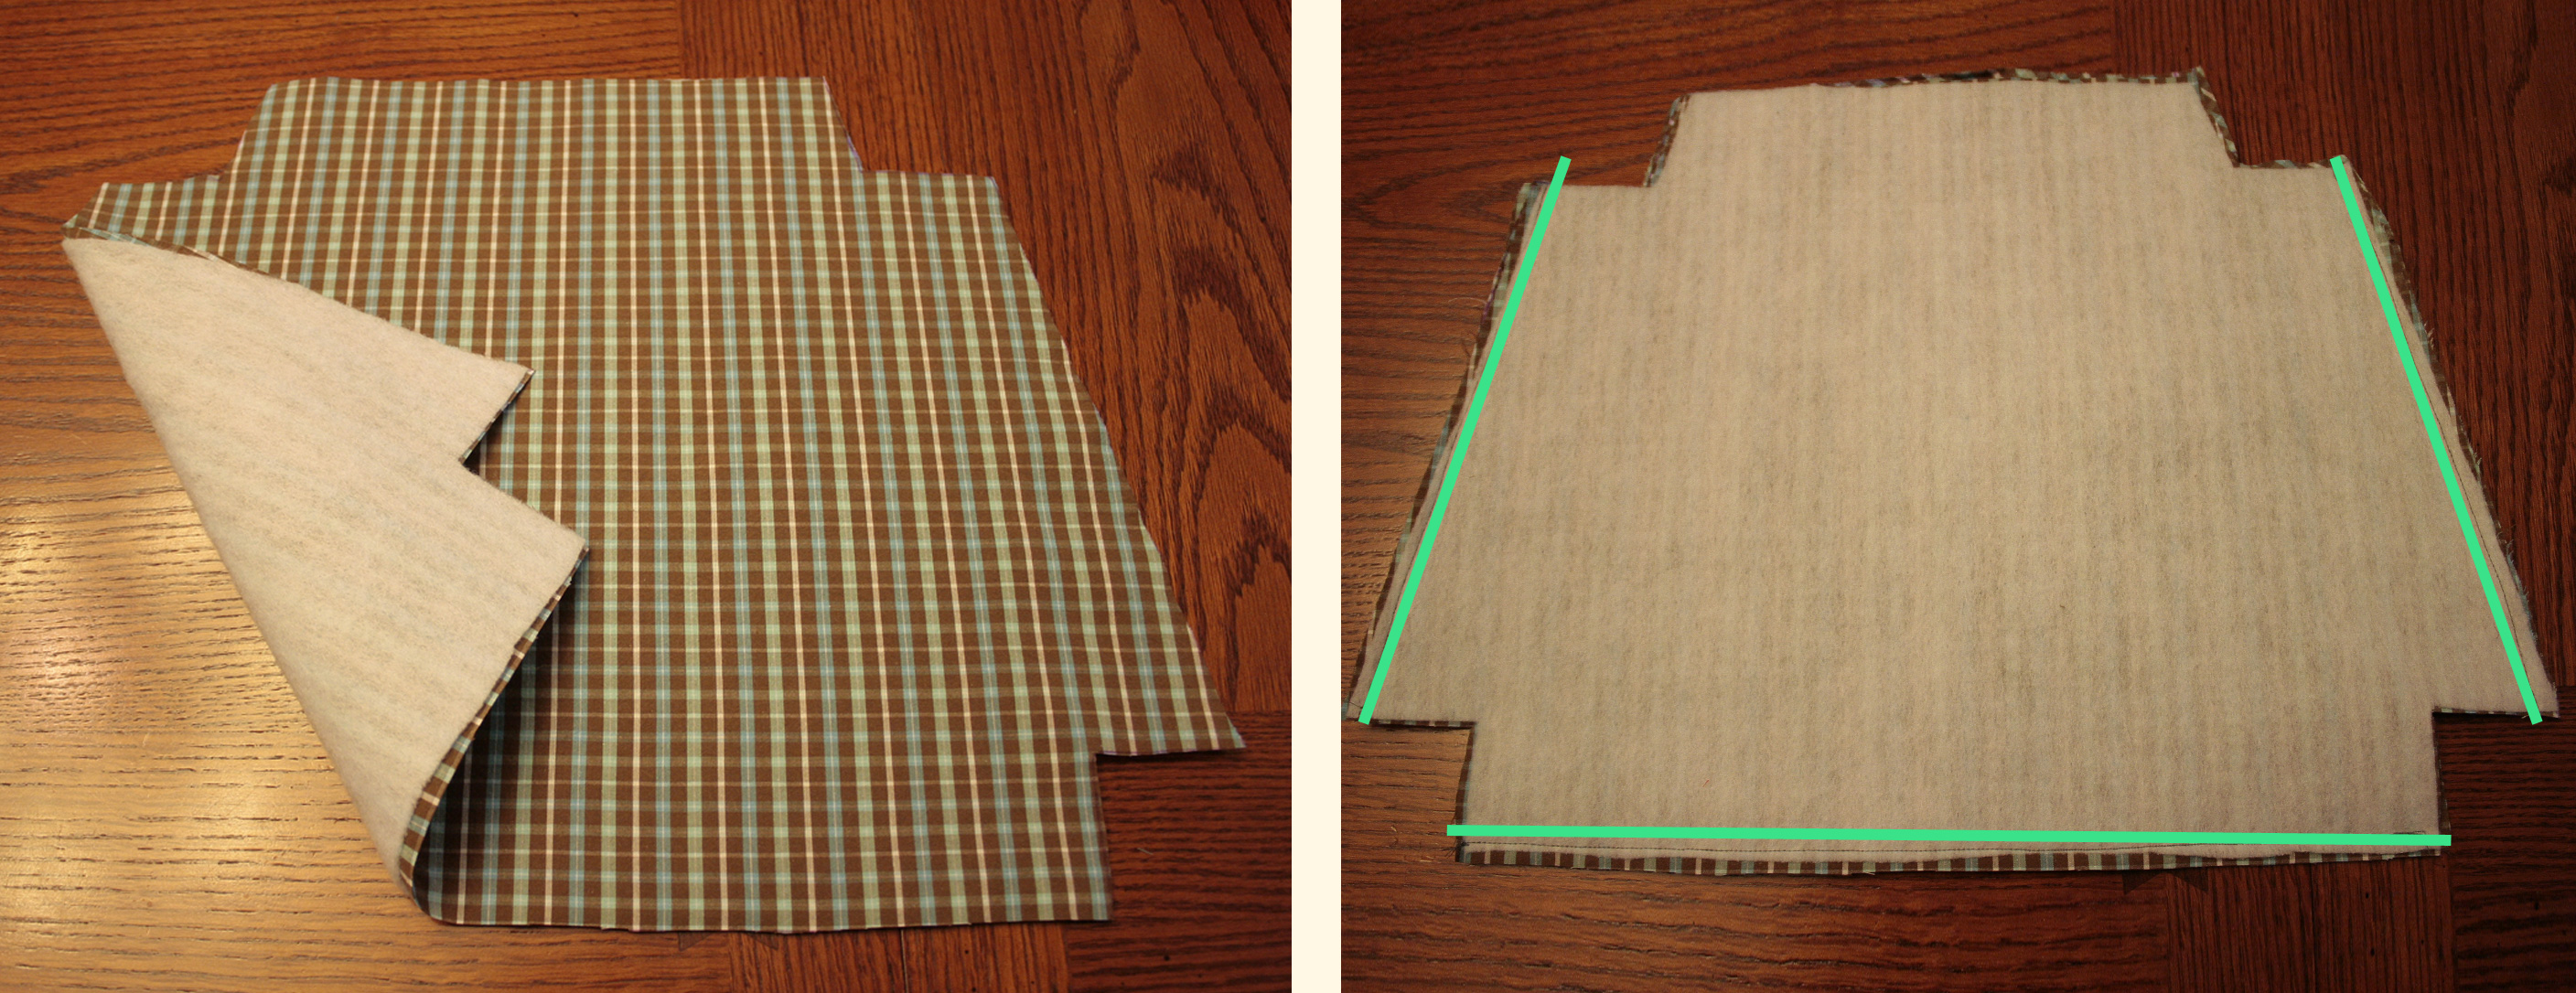

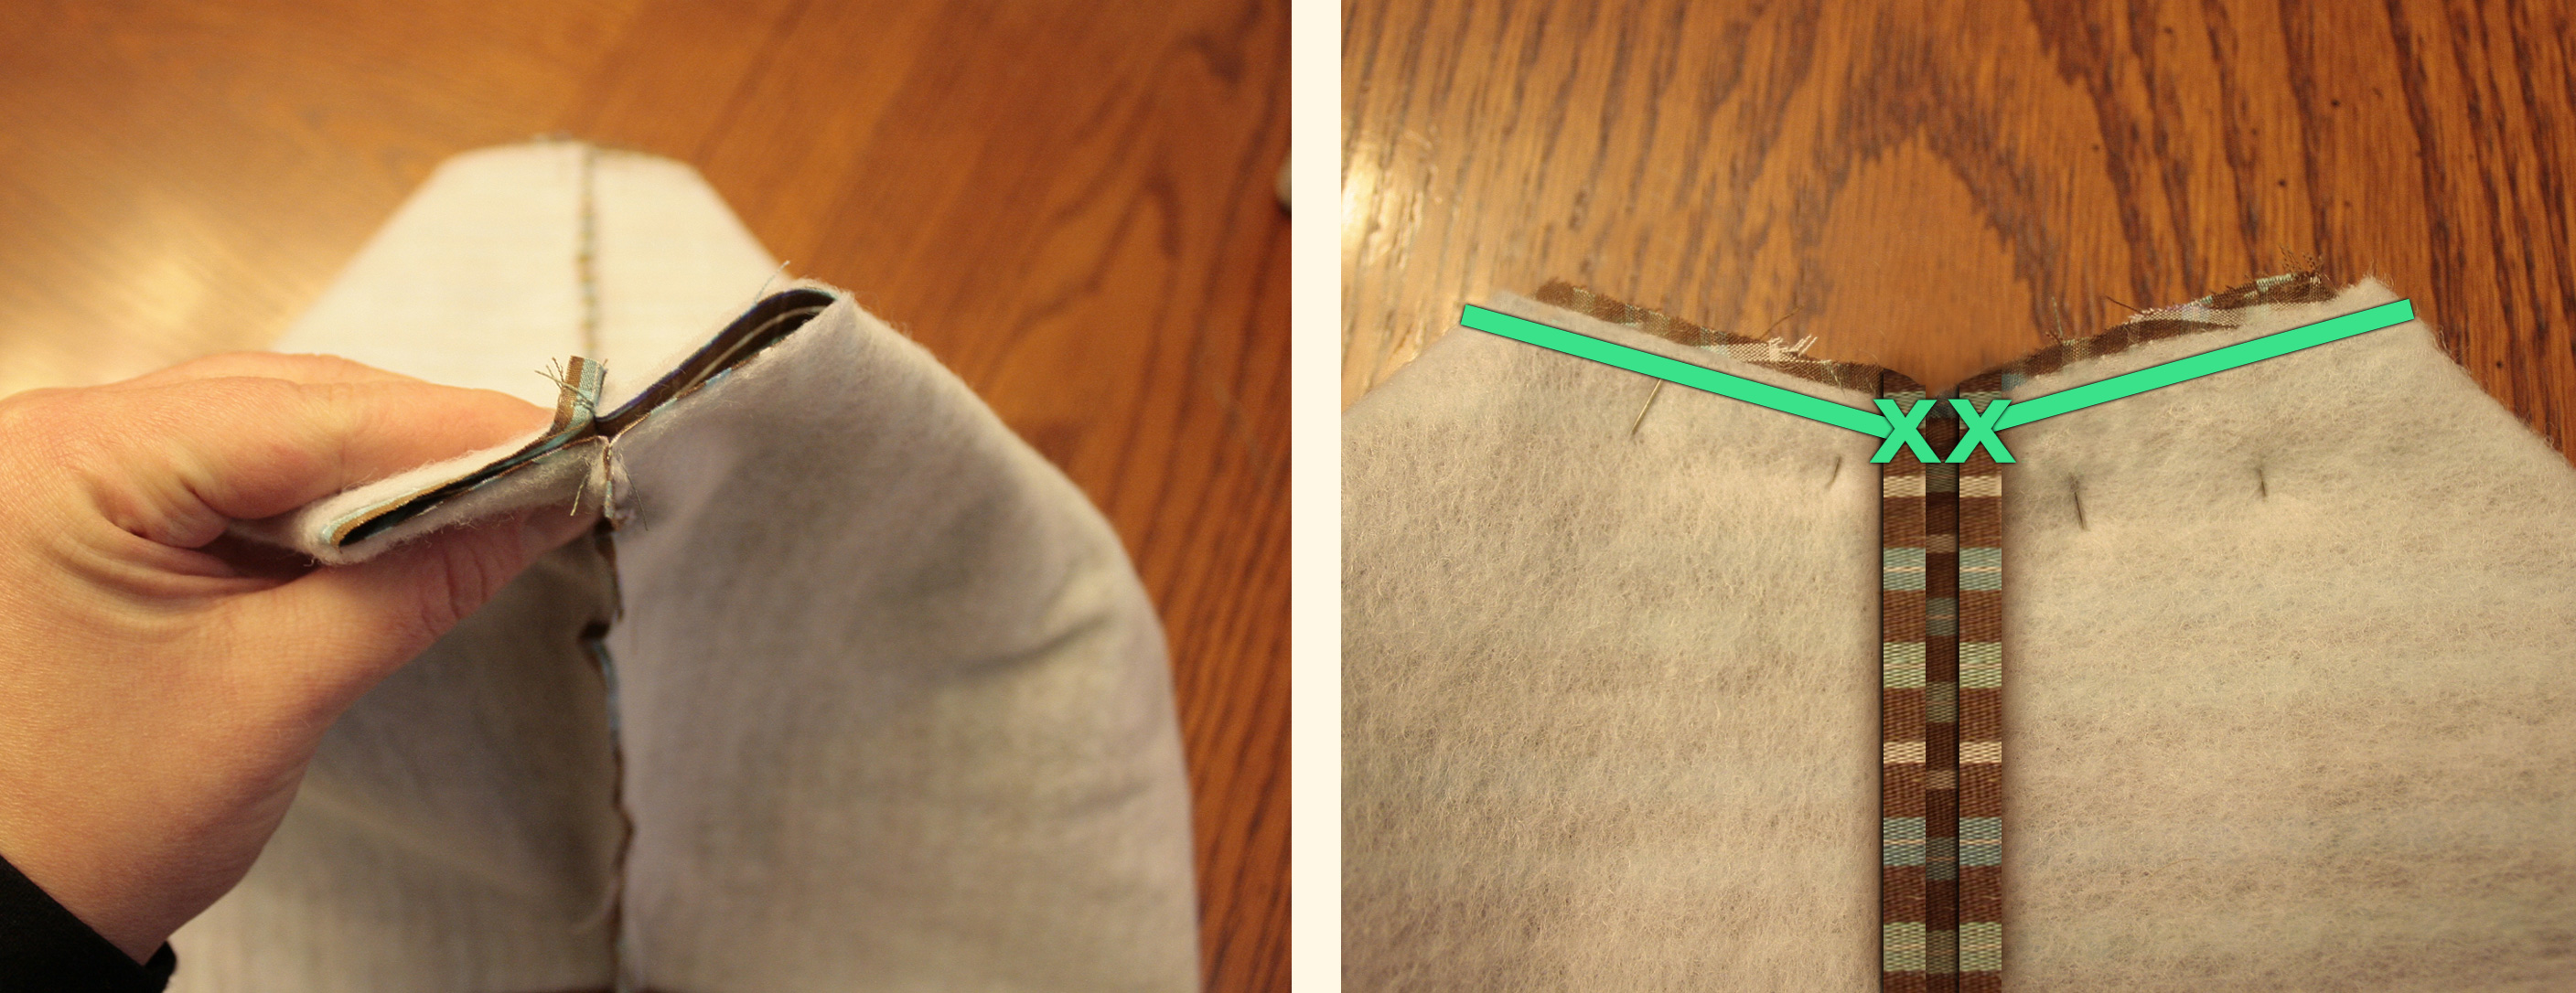
Then pinch together the bottom corners (left photo below) and sew them shut. Pinch together the top corners (right photo below) and sew together, sewing down your folded or hemmed edges from the step above and leaving a 1/4" gap where you'll be adding the zipper soon.


Follow the same instructions for the liner. Then nestle the liner inside the outer pieces. Now pin the zipper in place between the two layers and stitch along the sides using your zipper foot. (The left photo below shows raw edges, but in your version you should have either ironed or stitched the raw edge two steps ago.)


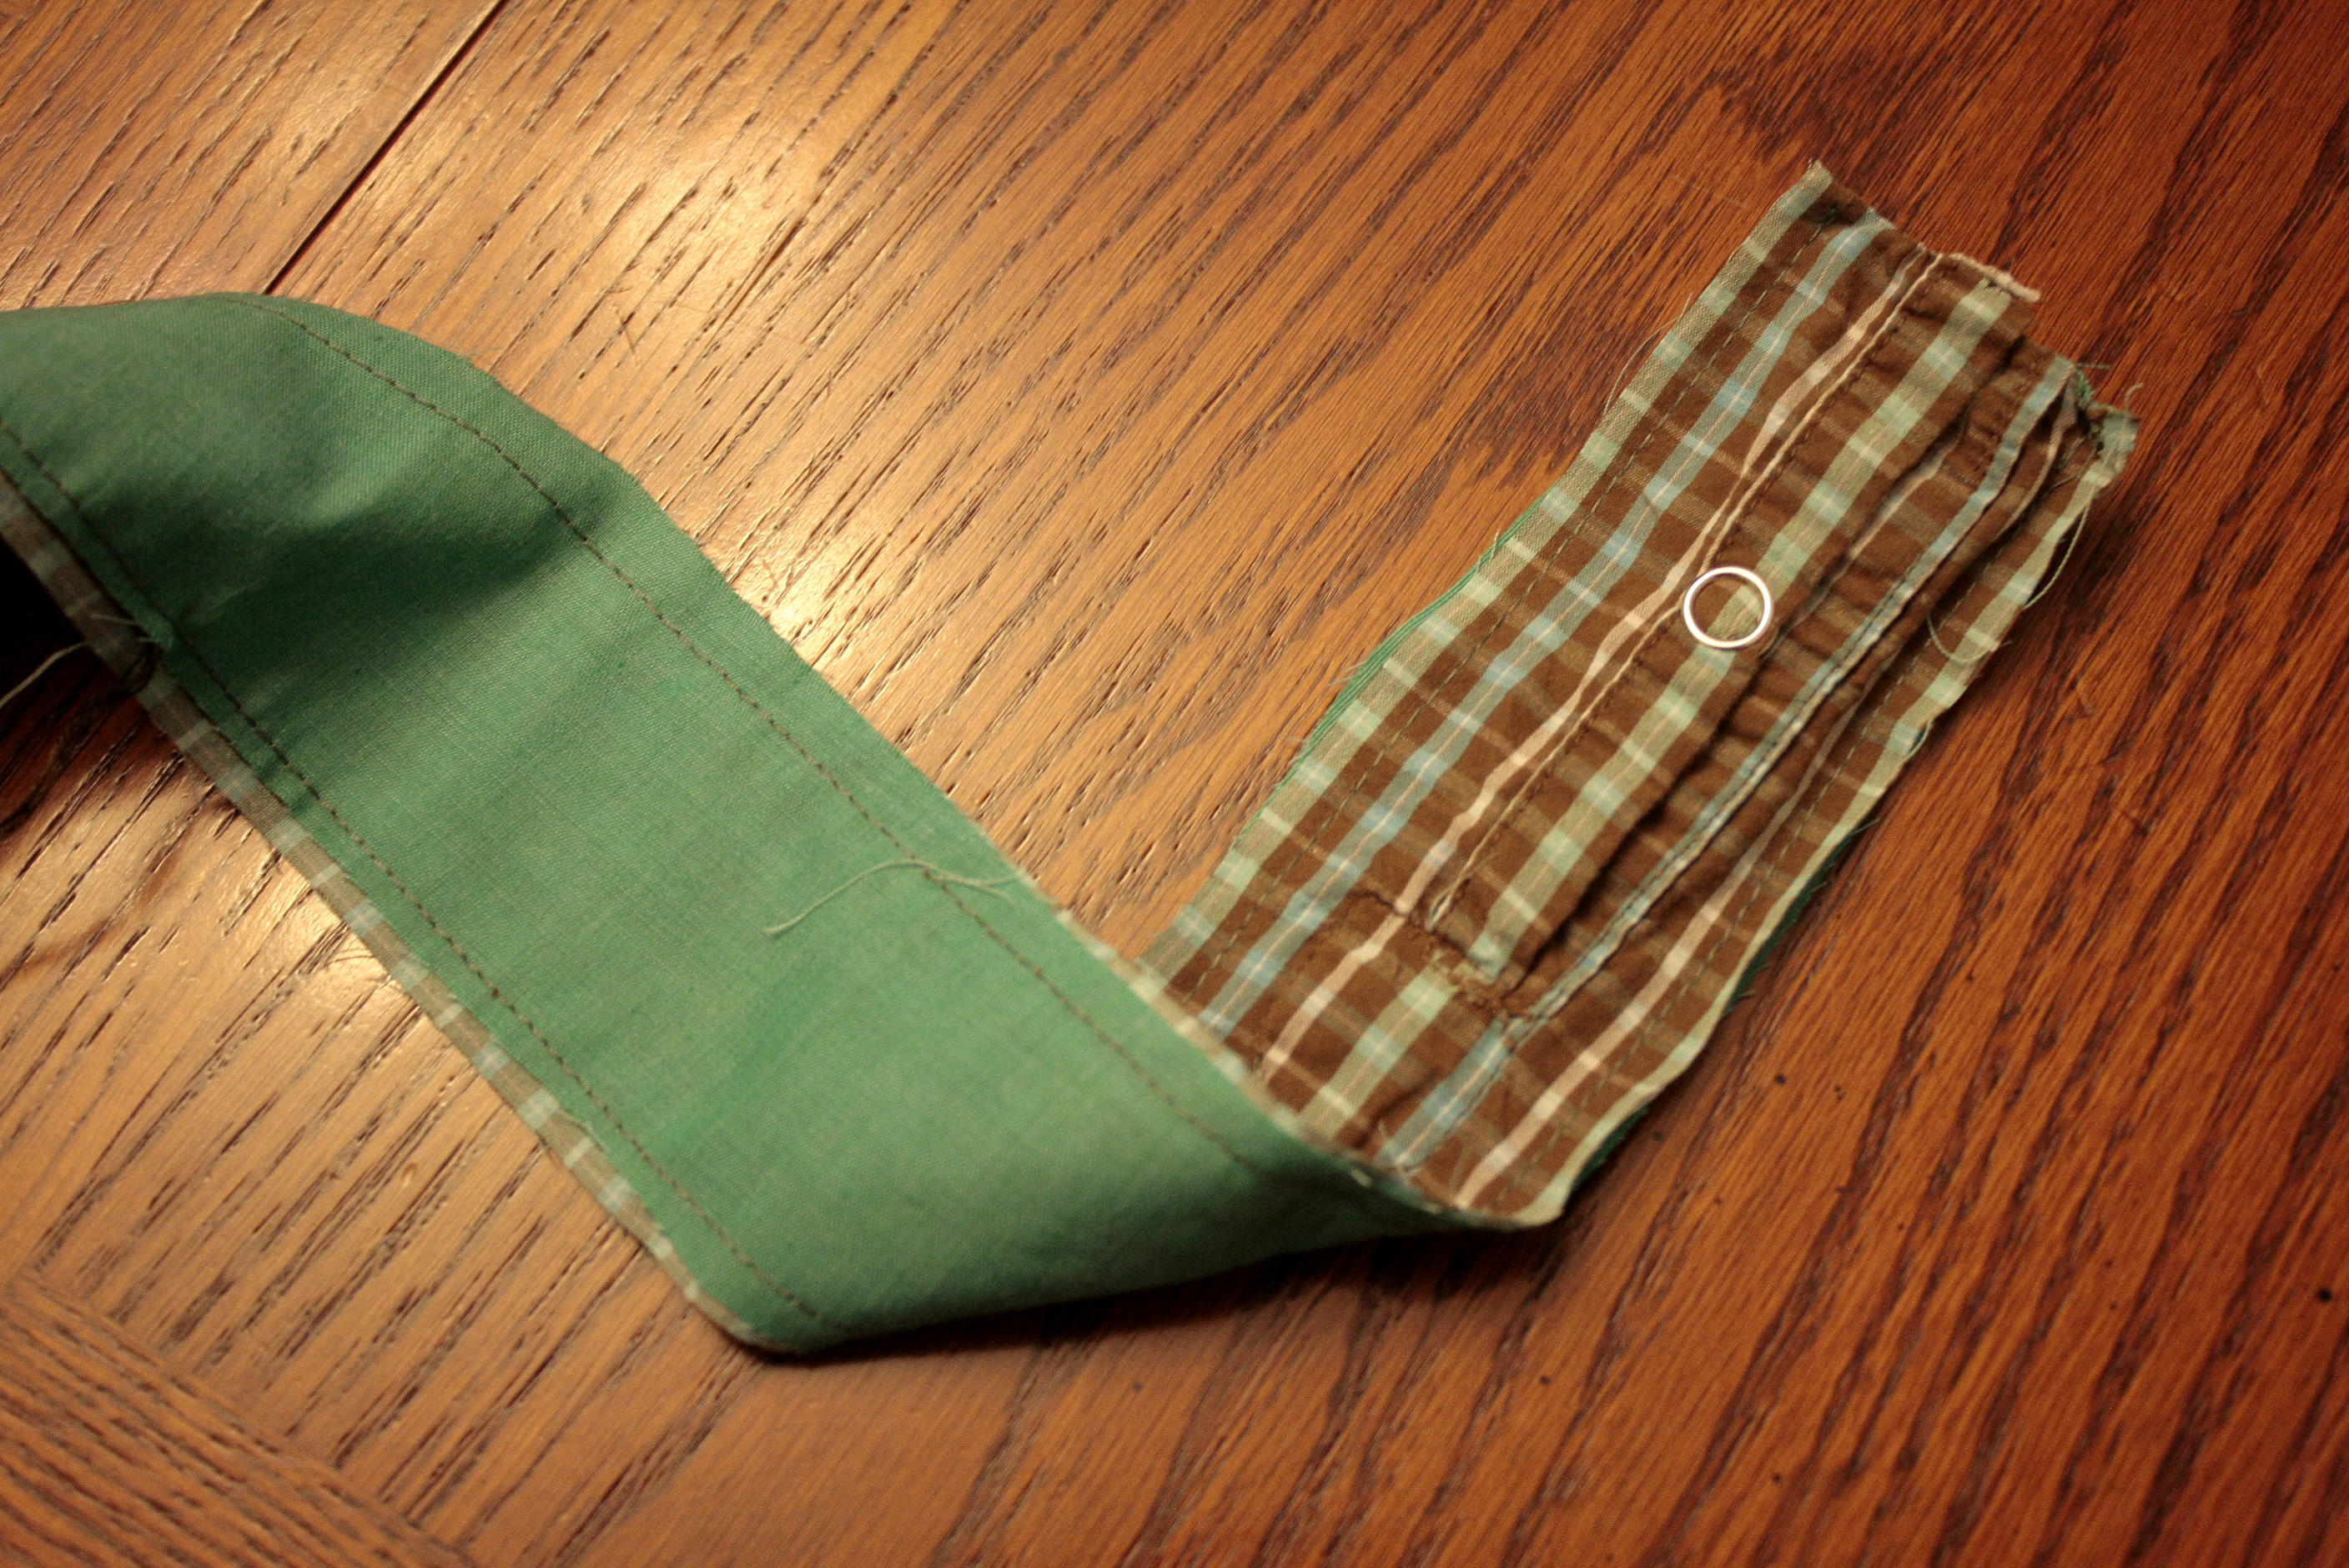
Now get the strap ready. First sew the strips together at the centers so you have a single long strip from the shirt fabric and from the liner fabric. Then sew them together with right sides together (shown below). Turn right side out. Hem the bottoms or fold under. Then sew the strap to the bag with an X inside a square.
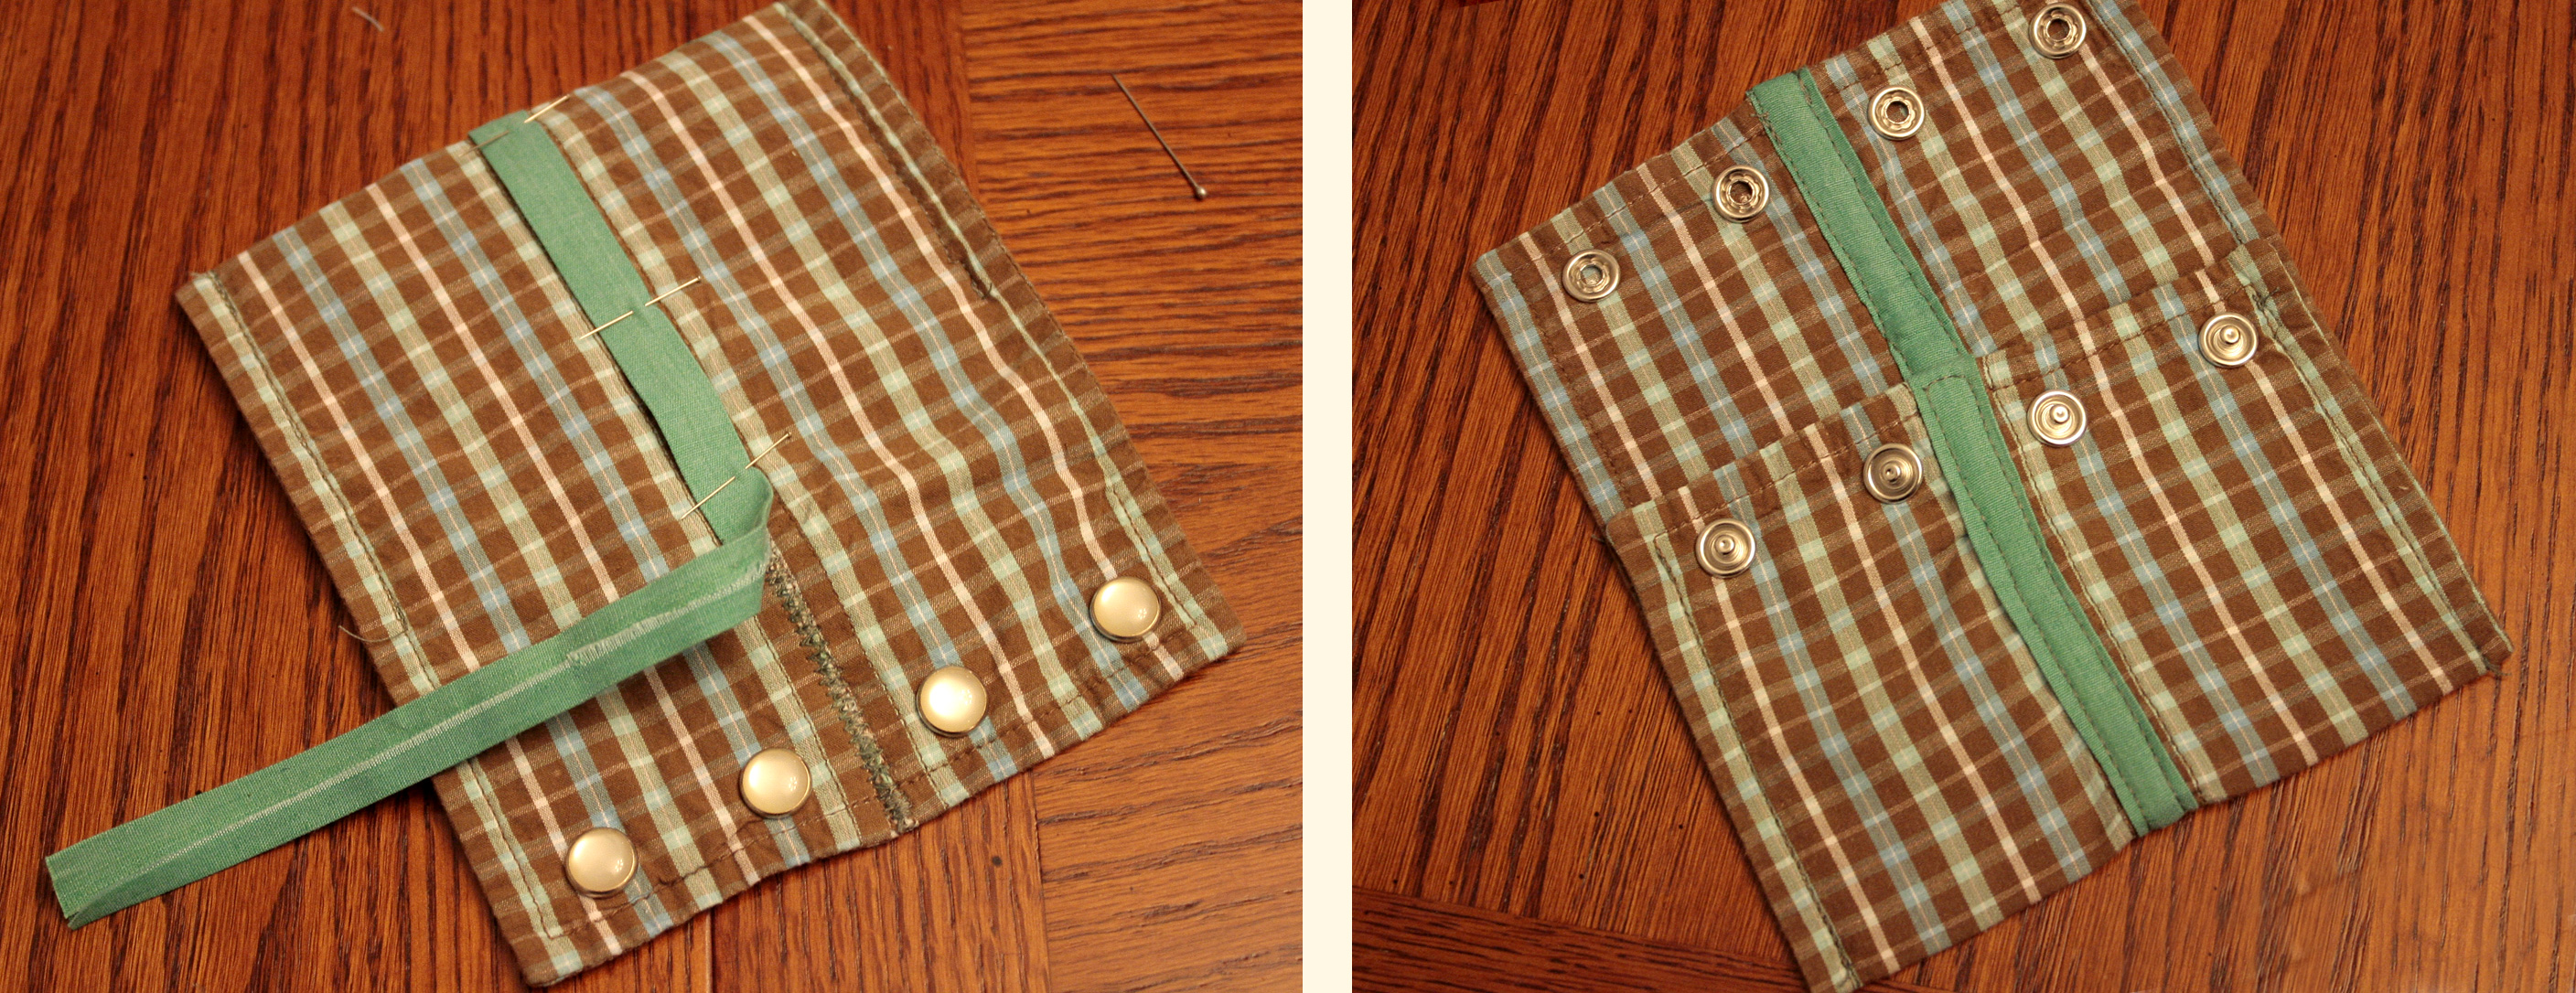
For the wallet you'll cut off both cuffs from the shirt and open them up. Line up the raw edges of the two cuffs and zig zag stitch them together. Cut a 1" strip of fabric for the contrasting stripe and iron the long edges under 1/4". Sew it to the center to cover up the zig zag stitching/raw edges of the cuffs. Then fold up about 2/3 of the bottom of the wallet and stitch down the sides. The snaps from the shirt act as the closure.


And here's a few more shots of the finished set!


* This is a free pattern designed only to give you a guideline as to how I made this upcycled purse. All shirts are different so there are no guarantees yours will turn out exactly like this one. Please use the pattern at your own risk. 

Friday, March 25, 2011

Upcycle! Hoodie into Cowl Neck Pullover


We have a lot of hooded sweatshirts at this house and I've always wondered if I could convert them into something else. There's a boy's shirt contest going on over at I Am Momma Hear Me Roar so I decided to give it a shot. Here's a great way to transform those hooded sweatshirts into a cowl neck pullover!

Start out with a sweatshirt that fits your child (or you!) comfortably with a little extra room because you'll be loosing just a little bit of the width. Make sure the hood fits comfortably over their head. My son normally wears 24 month sized clothes but I used a 2T for this project. *If you are using a different style shirt check out the tips at the bottom of the post.

First you'll cut out the zipper. It's easiest to do this from the inside of the sweatshirt and to cut as close to the zipper as you can.


Next cut off the hood and cut off the seam that connected the hood to the rest of the shirt. You may need to use a seam ripper to remove and bits still stuck to the sides.


Your cut up shirt will now look like this:


At this stage you'll want to remove any embellishments like the basketball patch on my sweatshirt above. Next lay the hood flat. If it is unlined like most hoodies you'll cut it twice the final desired so you can fold it in half. Add an additional 1/4" to that measurement for your seam allowance. I cut a strip 4 3/4" for my son's 2T size shirt.


 Now you're ready to start sewing! Fold the sweatshirt inside out and pin the seam together. I cut the pockets so they would be 1/2" away from the edge of the shirt. Next, sew along the edge with a 3/8" seam allowance. Start at the bottom so if the shirt shifts at all, at least that part will match up correctly!


Lay the sweatshirt out and press the seams open. Pin the seams down and sew 1/4" on each side of the seam. When you do this, fold the edges down over the sides of the pockets so when you stitch it up you'll close the pockets that you cut open when you removed the zipper.


Turn the sweatshirt right side out and pin the center of the neck strip (the piece cut from the hood) to the center of the neck on the back of the shirt. The right side of the hood should be facing out with the seam at the bottom.


Continue to pin around the curve of the neck.


Turn the shirt over and pin down the neck strip leaving a gap slightly larger than the folded width of the neck piece. My neck strip folded in half minus the seam allowance is 2 1/4" so the gap I left is 2 1/2". Sew the neck strip down all the way around the shirt. Do not stitch down the 1/4" at the edge where the Xs are marked below.

Next cut out the V of material between the neck strip. Cut along the edge of the neck strip on both sides and cut across where your stitches stop (1/4" before the edge of the neck strip). Click on the image below (or any image in the post) for a larger view. The smaller image is the same as the larger one so you can see how mine looked.


Fold the neck strip over so it resembles a dress shirt collar. Pin down the edges.


Sew the neck down all the way around as close to the edge as you can. Also, sew the front edge of the neck shut.


For the final step, turn the shirt inside out and line up the two edges of the collar with the opening. Pin it in place and stitch shut.


Turn right side out and the shirt is complete! You could easily add some extra character with piping around the neck or with contrast stitching.


*Tips for other shirt styles: If you're starting out with a lined hood you won't have to fold the neck strip in half like the example above. Below, using a 2T shirt, I cut the neck strip 2 3/4" for a final neck of 2 1/2" with 1/4" seam allowance.


With this style of pockets I was able to do just a single seam down the center and that closed the pockets back up. Because the graphic was misshapen after the cutting and sewing I just cut a patch from the extra hood material to cover it up. That also covered up the top of the pockets that became slightly mismatched after sewing!