click map Home Tutorials About FAQ
Showing posts with label shirt. Show all posts

Tuesday, May 31, 2011

Upcycle: Shirt to Purse


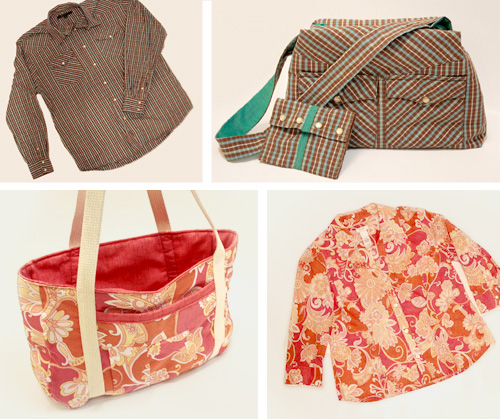
Some of you may recognize the top shirt/purse as my final project from One Month to Win It, a sewing/crafting contest that I won in April! I love the little details in clothing so I used those details in my purse patterns. You can find the pattern for the pink shirt/tote over at Craft Buds. I've uploaded a free PDF pattern* for this purse here. The pattern is 2 pages. You'll want to print both pages out, line up the dots and tape them together. For some reason, in my browser the PDF preview shows the pages are cropped but once I download it, it shows correctly.

For this bag you'll need:
  • one long-sleeved western style shirt
  • 1/2 yard fusible fleece
  • 1/2 yard fabric for the liner (I used a heavier weight home dec fabric)
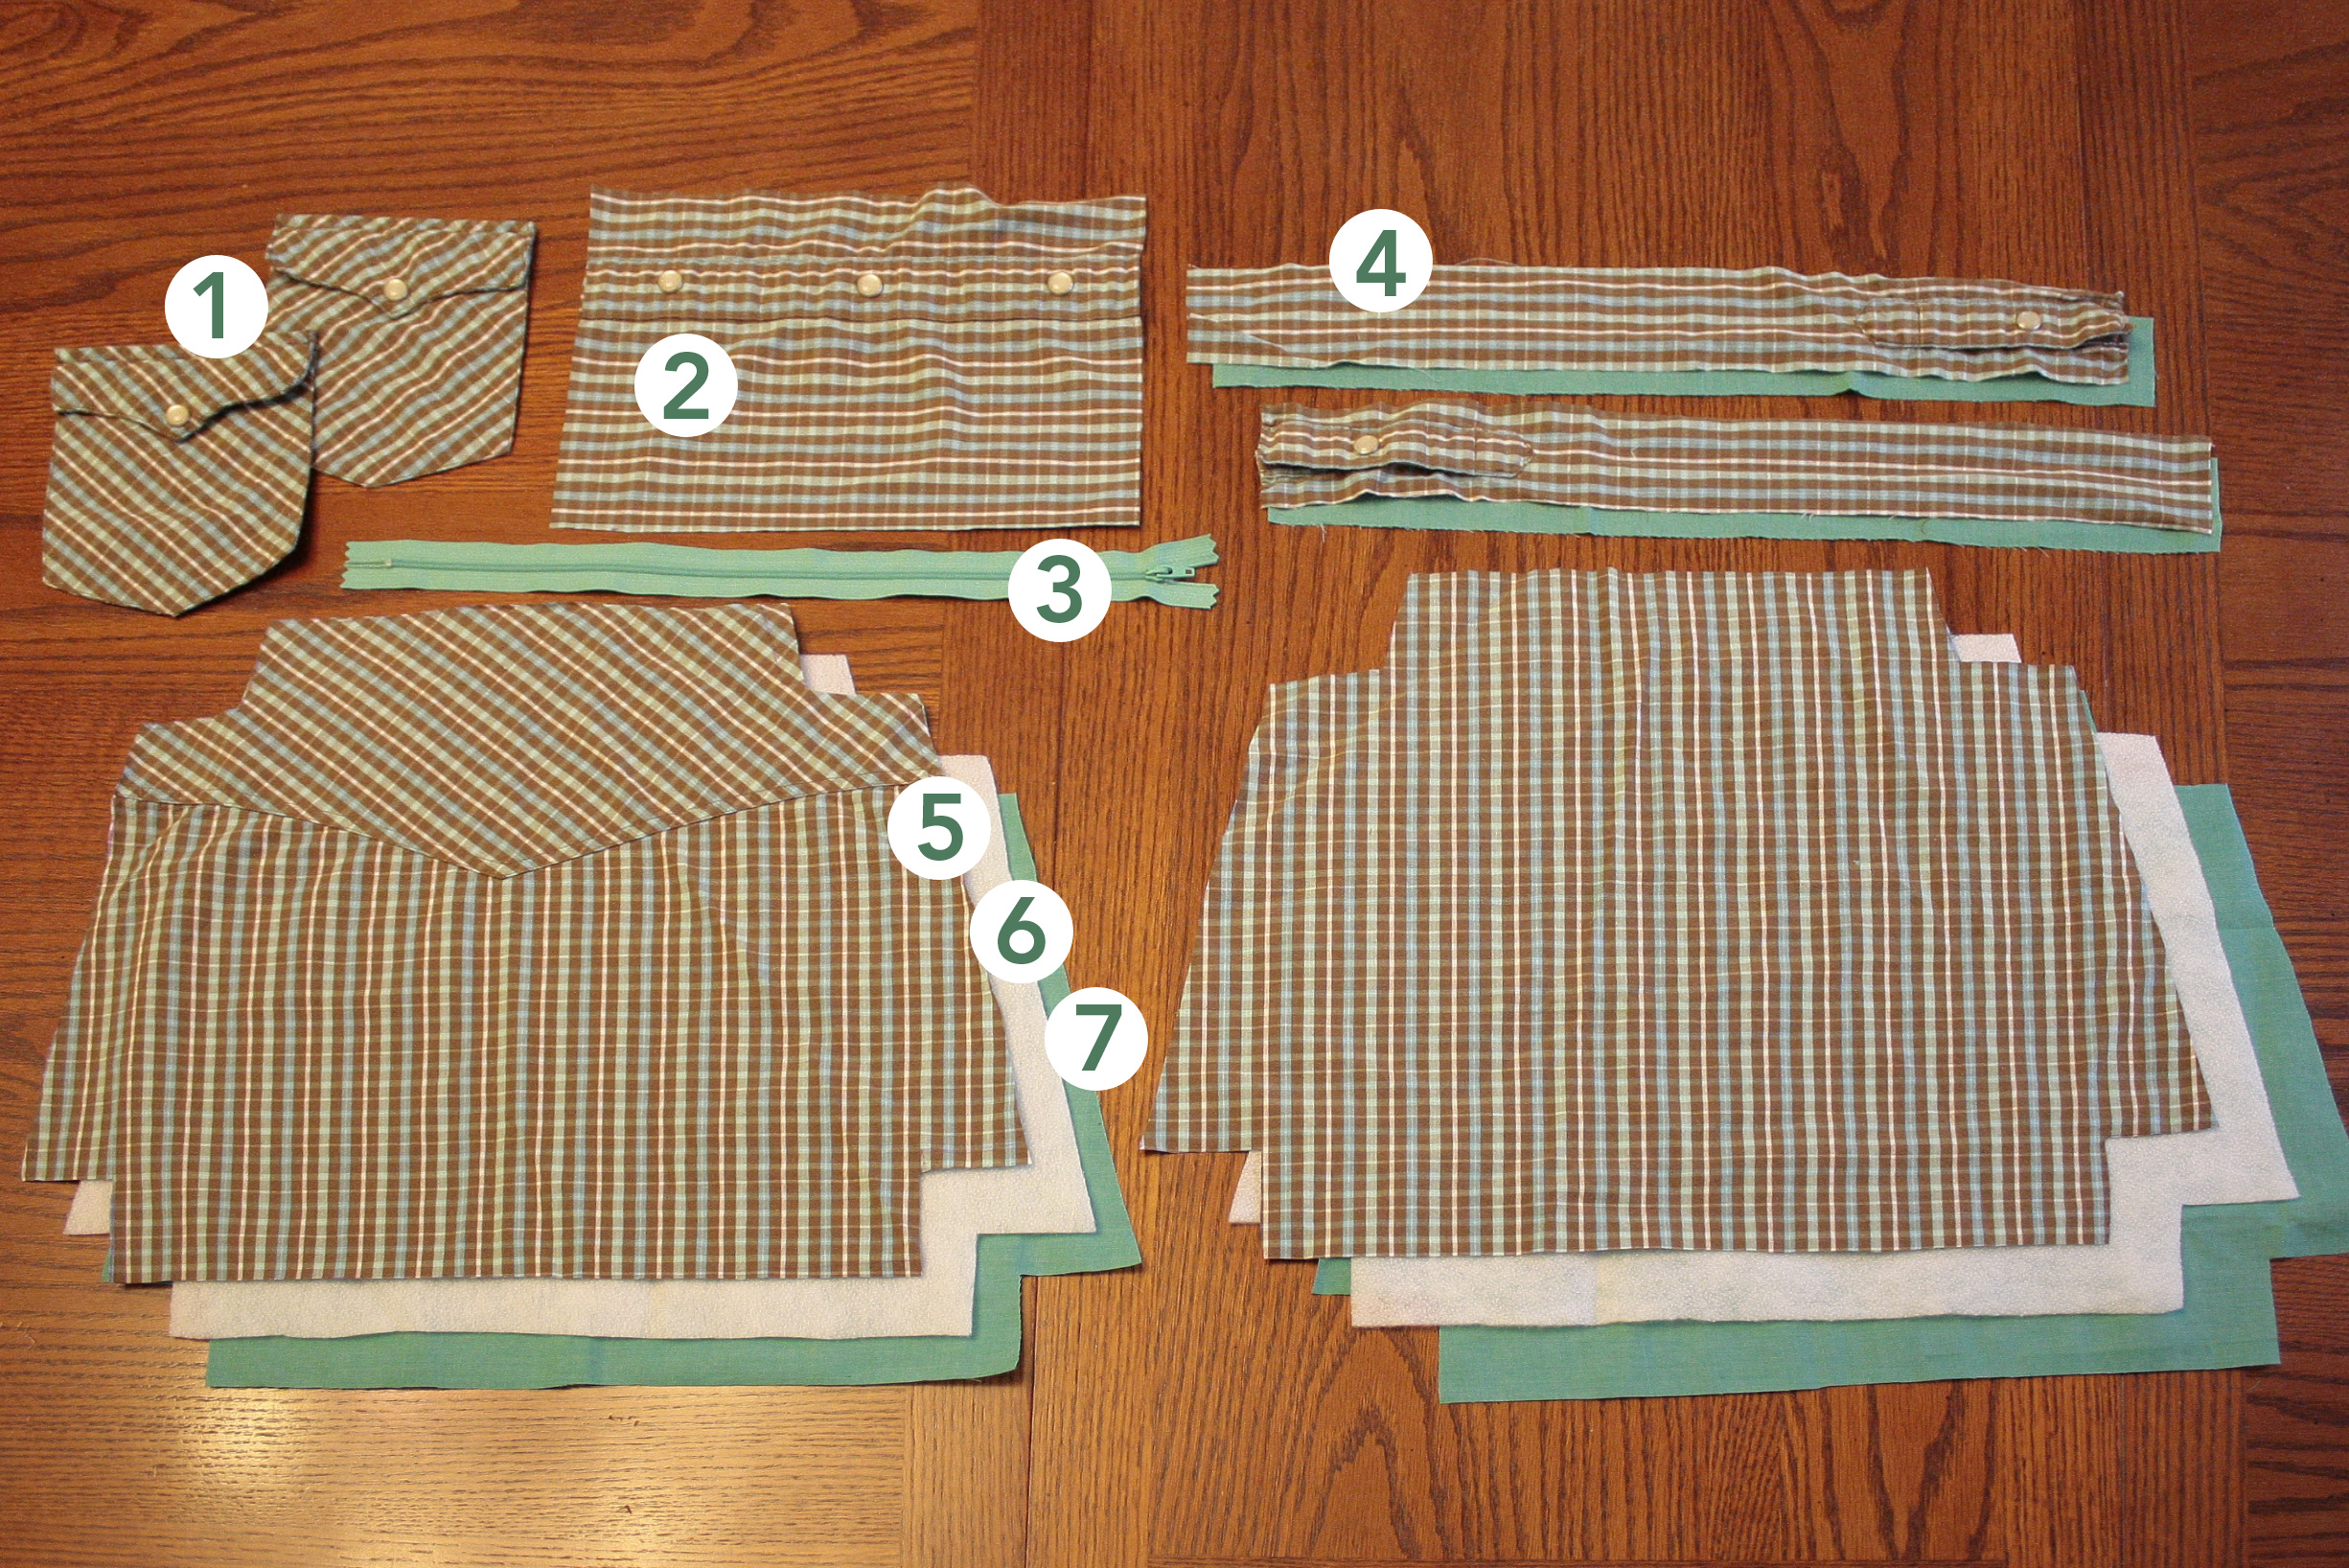
To get started, assemble all the pieces in the photo below including:
  1. Two pockets from the front of the shirt
  2. A 6 1/2" x 9 1/2" rectangle for the inner fabric including the buttons from the front of the shirt
  3. 12" (or longer) zipper
  4. Four strips total of 18" x 2 1/2" fabric, one strip cut from each of the two shirt sleeves including the button, and two strips from the liner fabric. (Using these measurements, the final sewn and attached strap will be around 34" long x 2" wide so feel free to adjust as necessary if you'd like a different length/width. If you're using a lighter weight fabric shirt and/or liner, you may want to add strips of the fusible fleece to the inside of the strap for extra reinforcement.)
  5. Use the pattern to cut pieces from the top back and lower back of the shirt for the main body of the bag.
  6. Use the pattern to cut two pieces of fusible fleece.
  7. Use the pattern to cut two pieces of the liner fabric.
  8. Save the cuffs for a wallet (pictured near the end of the post).
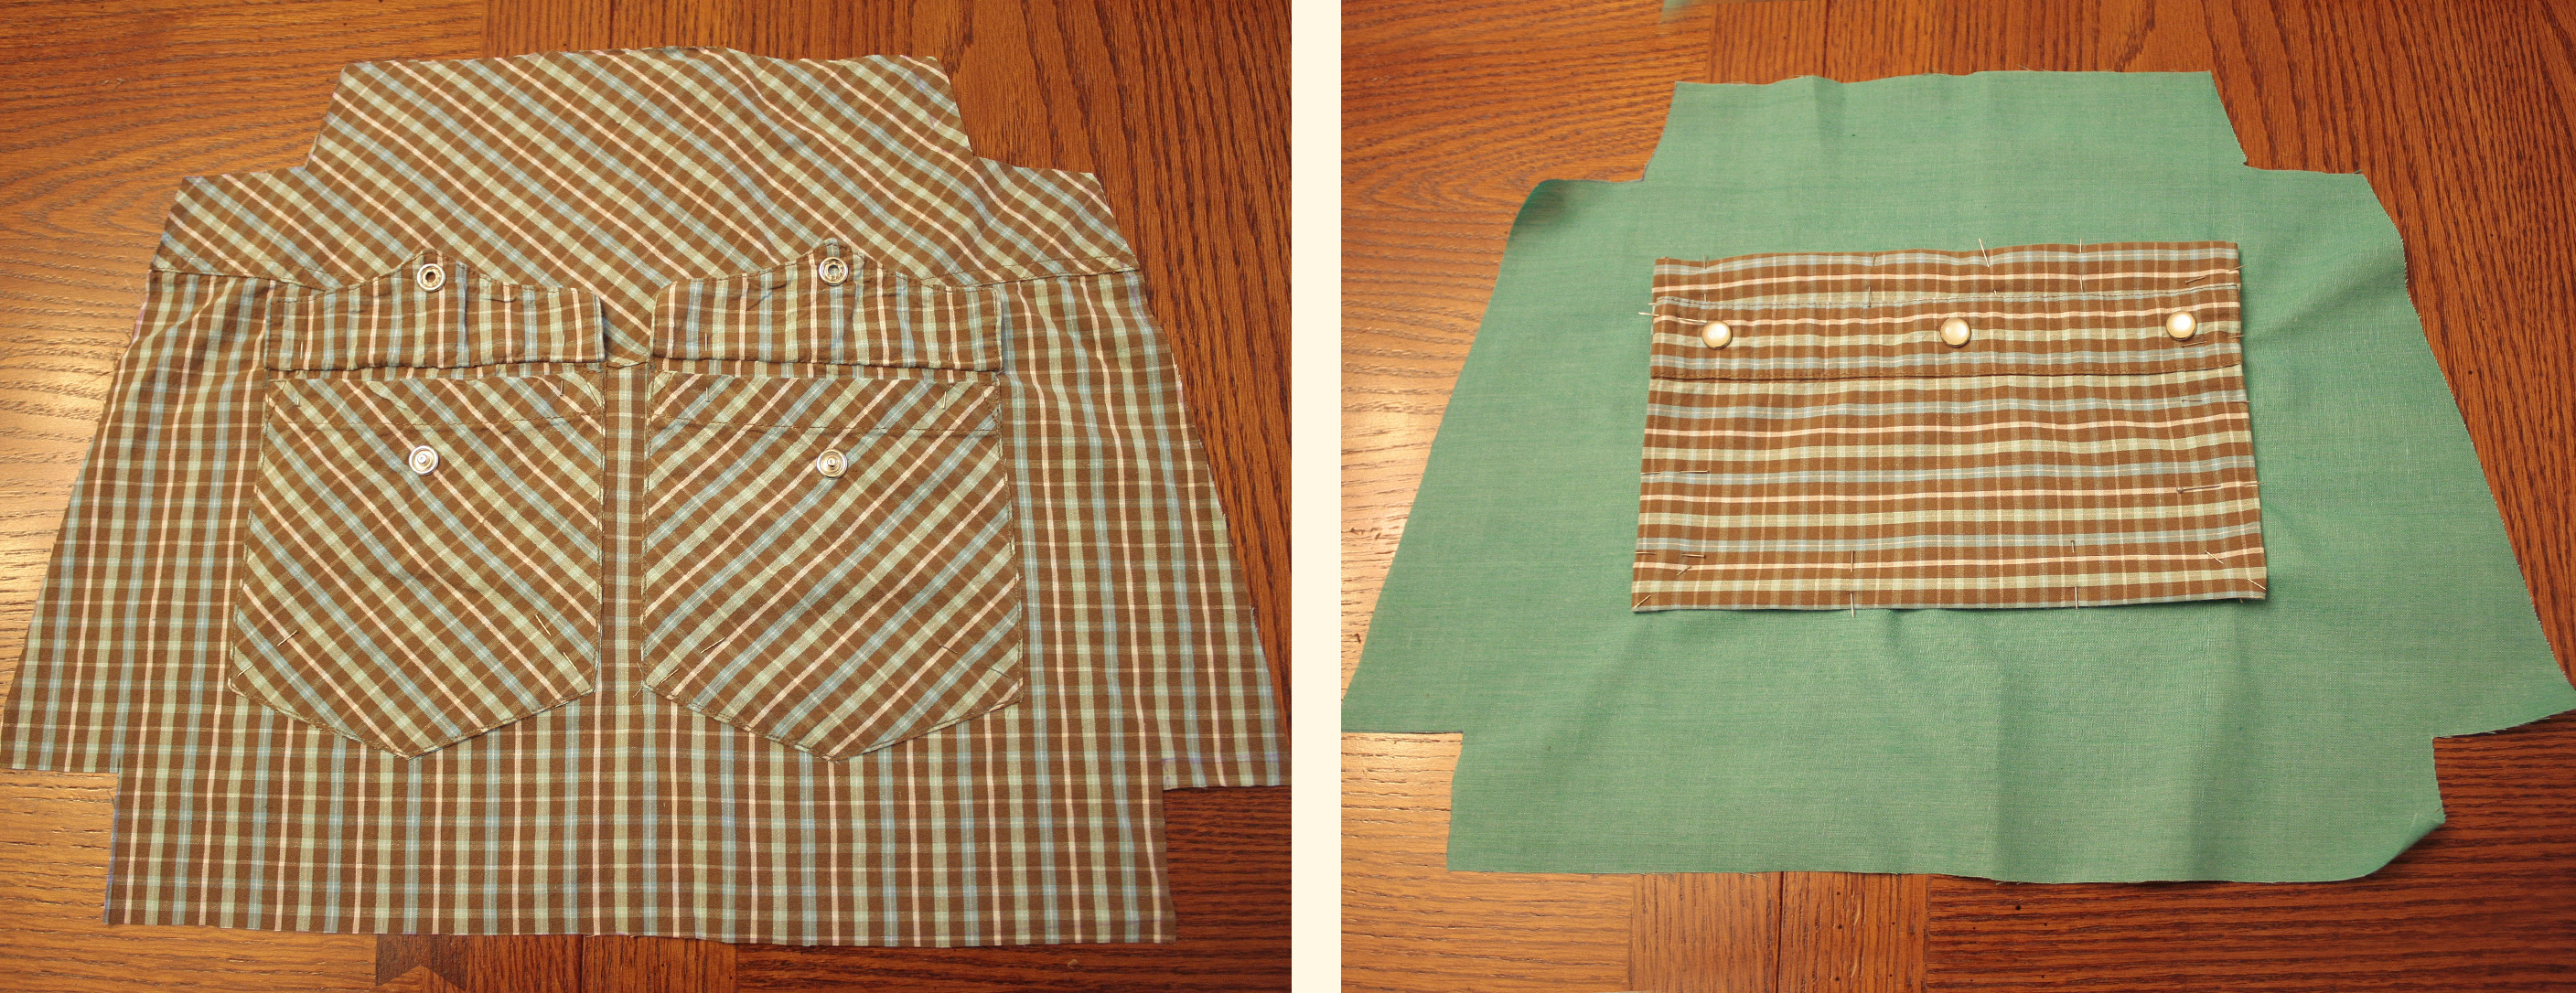
First you'll get the pockets ready. Sew the pockets to one of the exterior pieces (left photo). I sewed across the top, then pinned the flaps up and sewed the sides and bottom. For the inner pocket (right photo), hem the edges of the rectangle and sew it to one of the pieces of fabric for the liner.


Iron the fusible fleece to the shirt fabric. Iron the top of the piece down 3/8" to help later with the zipper installation. It's optional if you want to stitch it down.

Then with right sides together sew the bottom and sides shut.
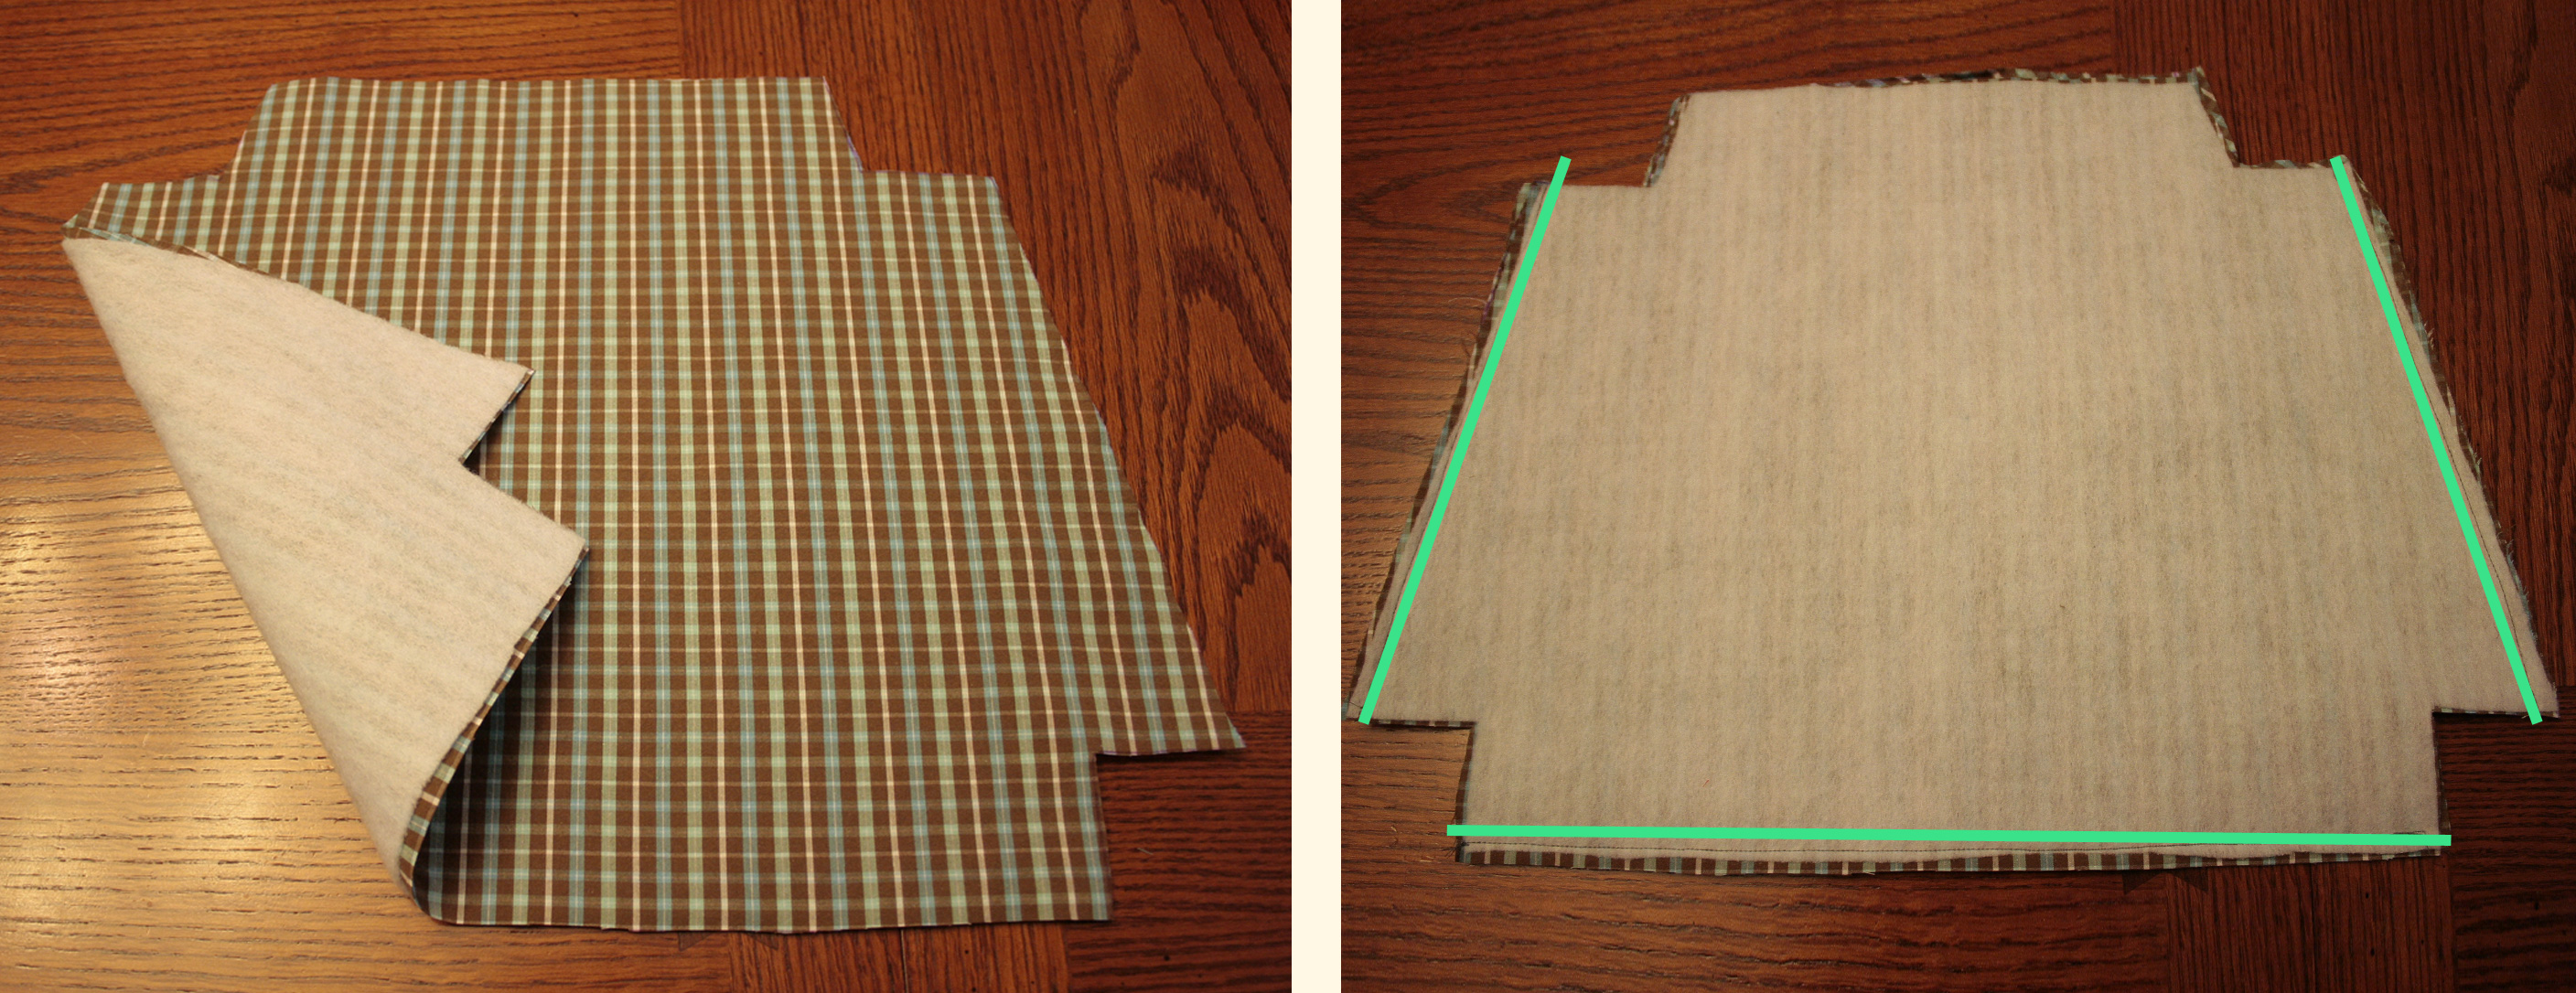

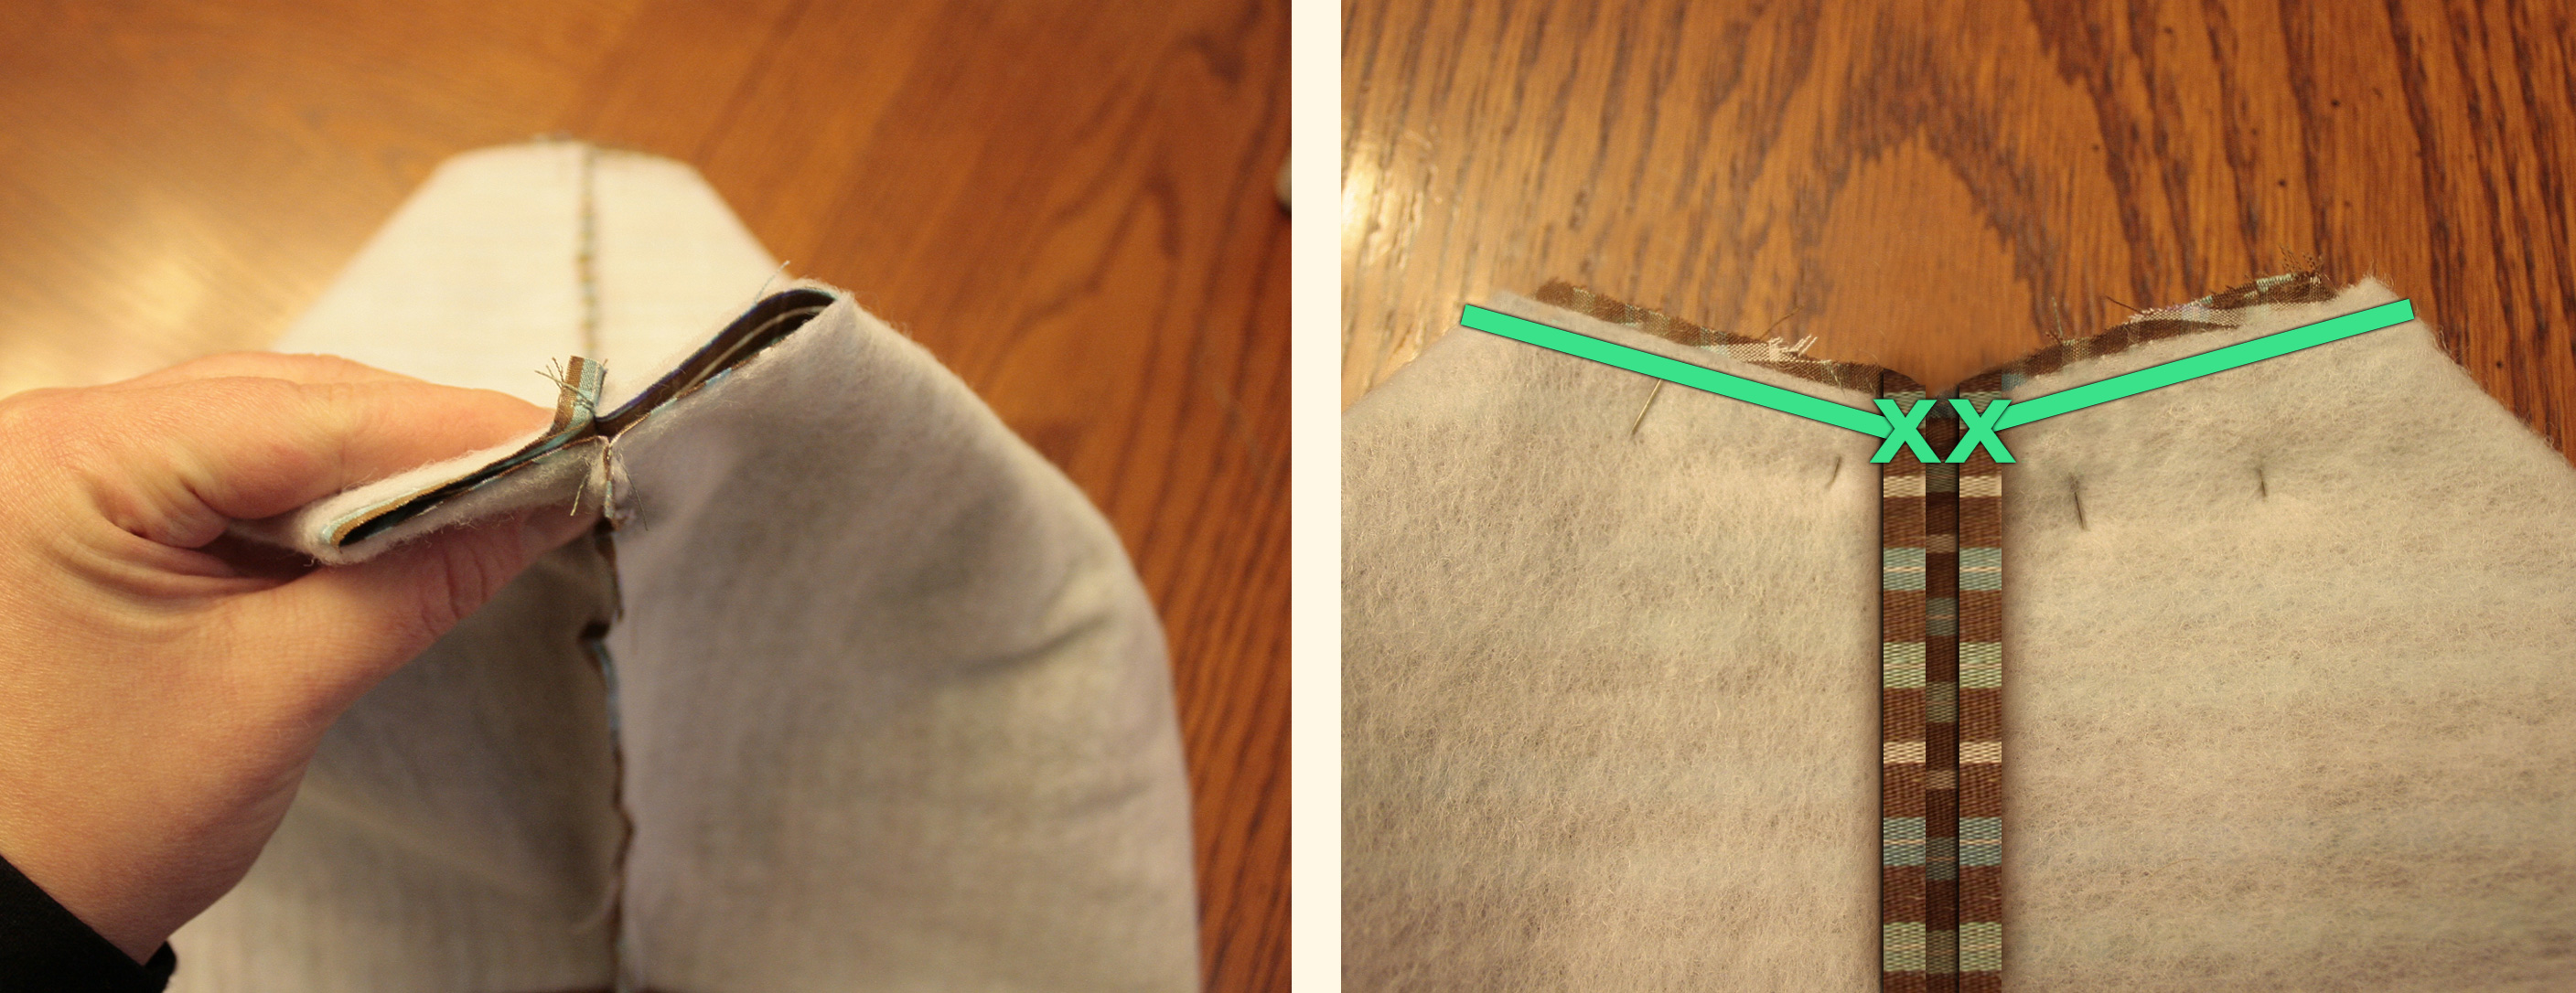
Then pinch together the bottom corners (left photo below) and sew them shut. Pinch together the top corners (right photo below) and sew together, sewing down your folded or hemmed edges from the step above and leaving a 1/4" gap where you'll be adding the zipper soon.


Follow the same instructions for the liner. Then nestle the liner inside the outer pieces. Now pin the zipper in place between the two layers and stitch along the sides using your zipper foot. (The left photo below shows raw edges, but in your version you should have either ironed or stitched the raw edge two steps ago.)


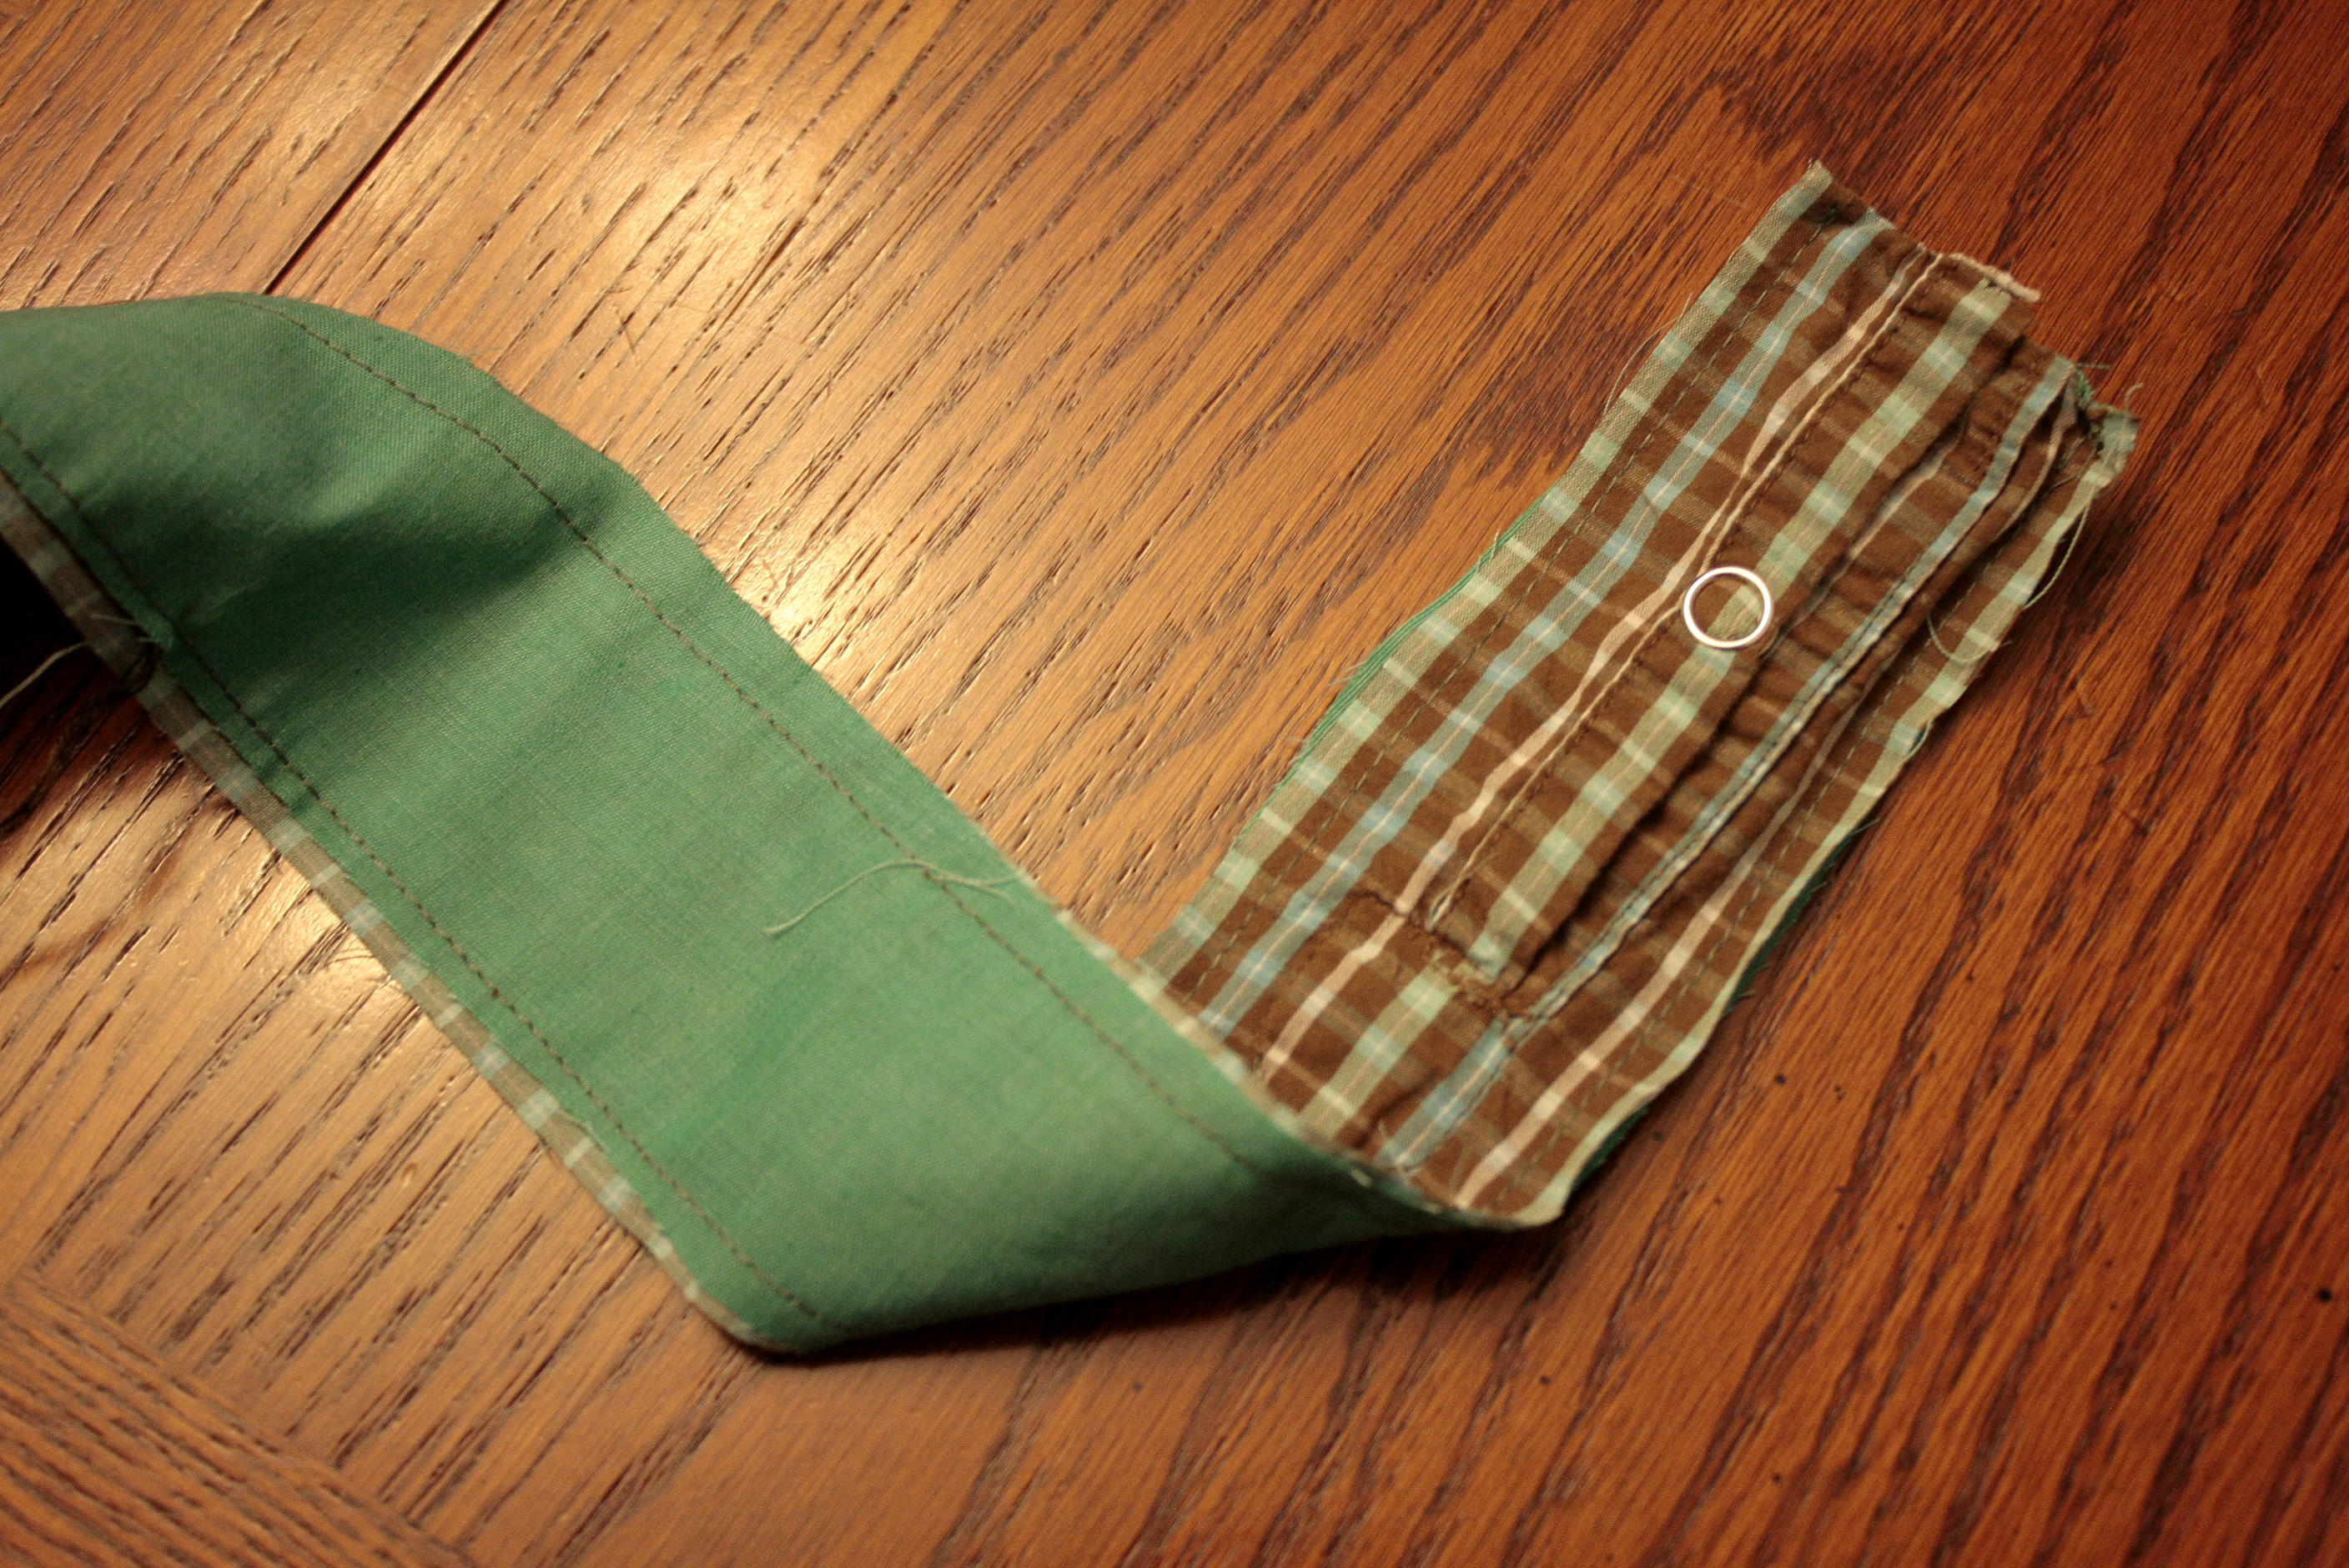
Now get the strap ready. First sew the strips together at the centers so you have a single long strip from the shirt fabric and from the liner fabric. Then sew them together with right sides together (shown below). Turn right side out. Hem the bottoms or fold under. Then sew the strap to the bag with an X inside a square.
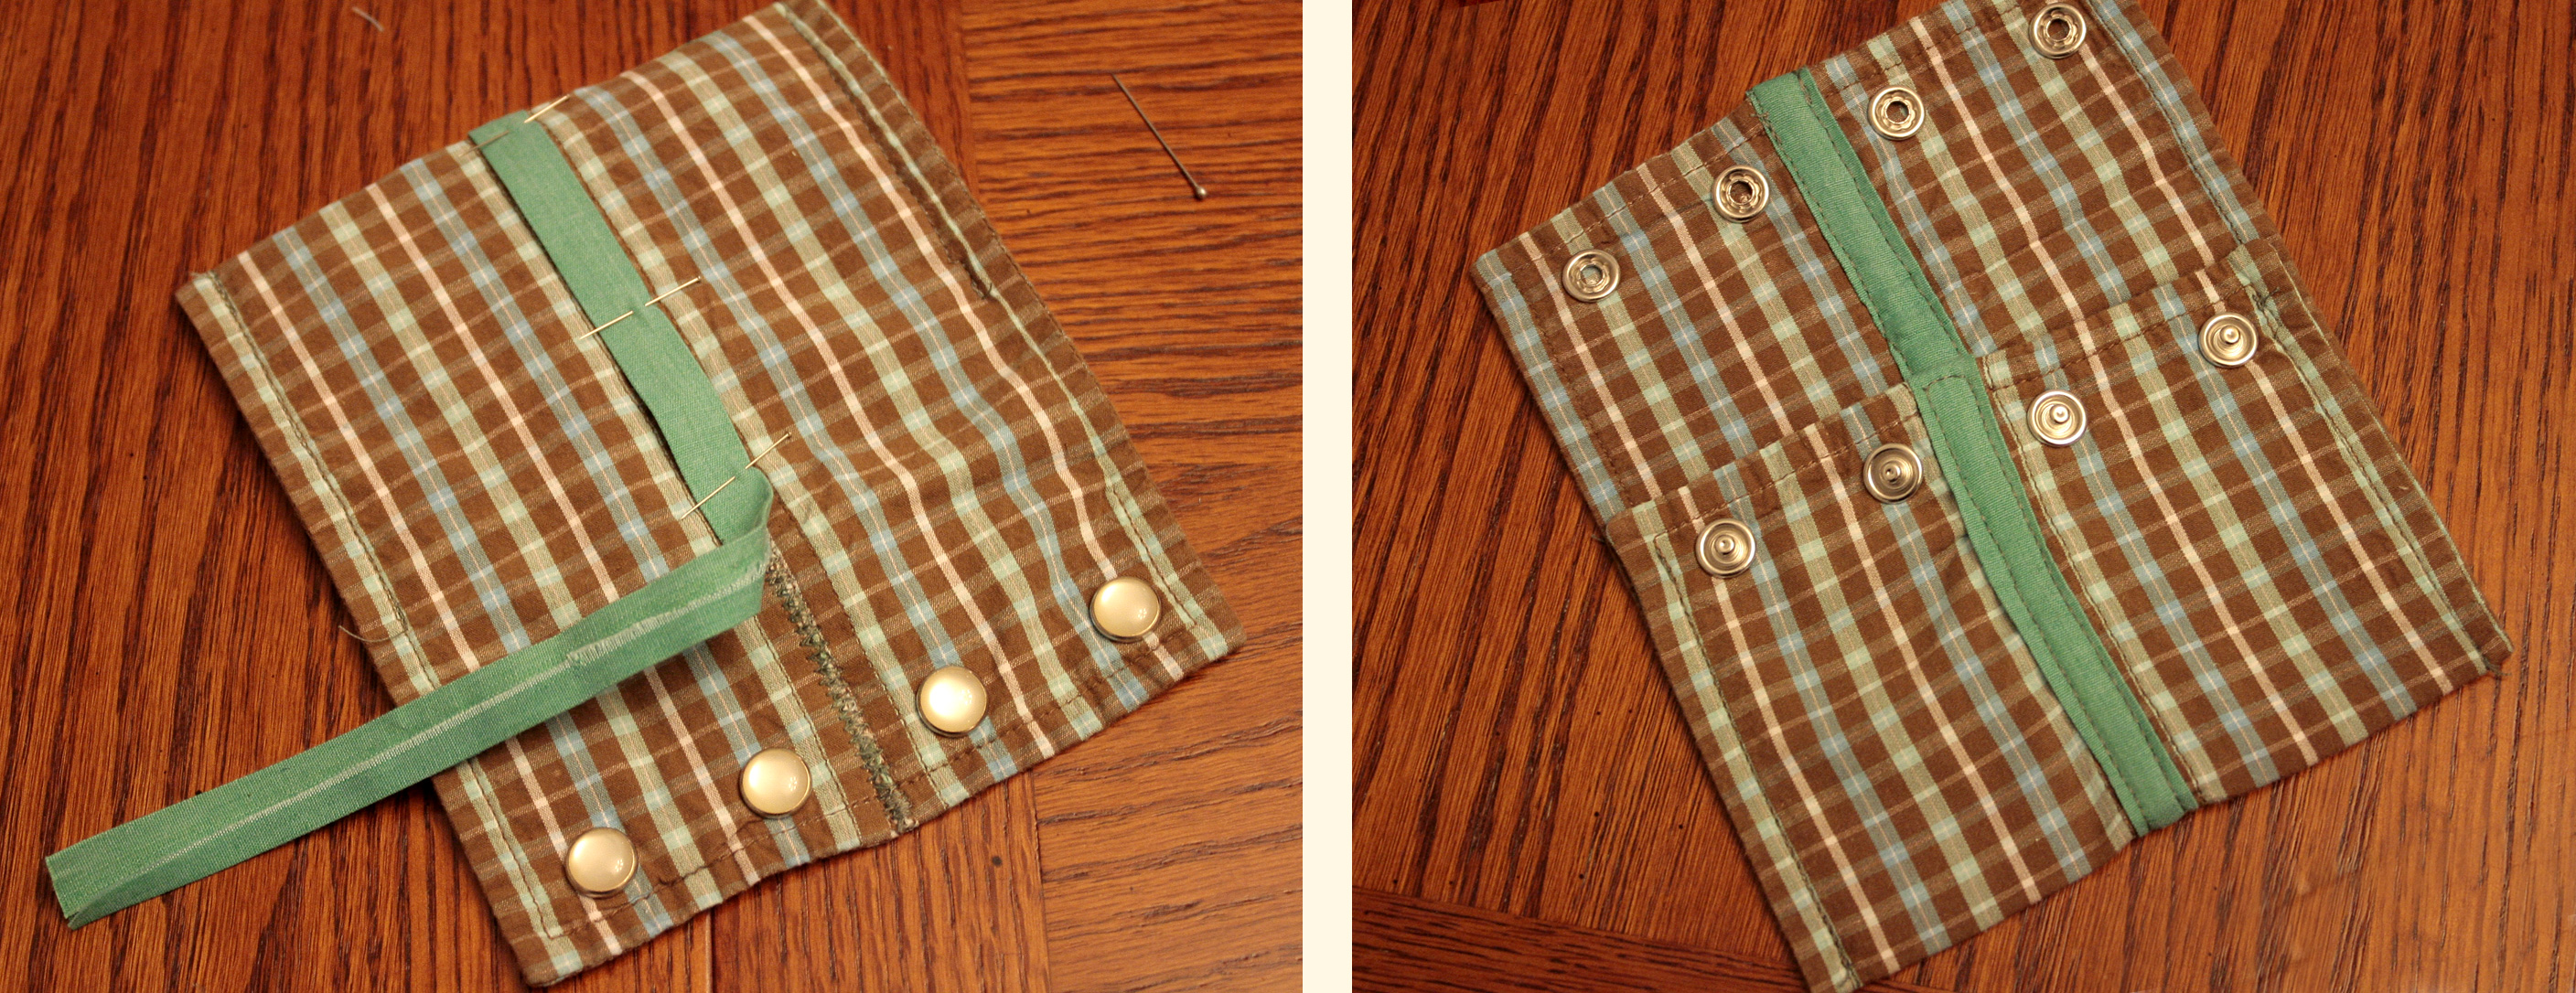
For the wallet you'll cut off both cuffs from the shirt and open them up. Line up the raw edges of the two cuffs and zig zag stitch them together. Cut a 1" strip of fabric for the contrasting stripe and iron the long edges under 1/4". Sew it to the center to cover up the zig zag stitching/raw edges of the cuffs. Then fold up about 2/3 of the bottom of the wallet and stitch down the sides. The snaps from the shirt act as the closure.


And here's a few more shots of the finished set!


* This is a free pattern designed only to give you a guideline as to how I made this upcycled purse. All shirts are different so there are no guarantees yours will turn out exactly like this one. Please use the pattern at your own risk. 

Sunday, January 23, 2011

Tutorial: Custom Tees


I was checking out the Crap I've Made blog a couple days ago and saw this great paint product. Tulip's Soft Velveteen Fabric Paint. After drying you steam it with an iron and it changes texture to a flexible soft raised almost rubbery feel. Despite being the coldest day in ages, my toddler and I braved the weather to go get some of this paint. It was even on sale at JoAnn's so it was meant to be.


I decided to do an Elmo shirt but just think of all the letter stencils, t-shirts, tote bags, household items, monogrammed pillows, aprons, and who knows what else you could use this on! Char at Crap I've Made used it to make letters on a Valentine's Day bunting (check out the blog link above, she has a lot of great projects and tutorials!).

The shirt I'm using is from Wal-Mart's Garanimals line. For $3.50 they have solid color boys or girls shirts (the girl shirts are cuter than the boys, as usual) up to size 5T. I found the Soft Velveteen paint in 3 of the colors I needed, red, black and white. They didn't have orange or yellow to mix with the red so I ended up getting just a matte finish orange.

I started by making a stencil. I then made 4 copies of it and cut out the openings for each of my 4 paint colors. I used card stock paper for my stencil. It worked okay for one use but it did start to curl a tiny bit after the second coat of paint. Freezer paper would have been a better choice.


I pre-washed the t-shirt and I put cardboard inside underneath the areas I was painting. I chose to do a bigger Elmo on the chest and a little one on the wrist so the wearer could see it.

I used Duct tape repositionable Easy-Stick tape to hold my stencil in place. This was especially essential for the extra mouth piece that wasn't connected to the main stencil. Just make sure to get the adhesive around your stencil so the paint doesn't bleed underneath too much. You could also use spray glue. Then I used a sponge brush to put on 2 coats of paint in each color.


I ended up doing the red, orange and white with the stencil and just used a small brush to paint in the black. The paint bled a tiny bit under my stencils so I wanted to cover those imperfections accurately when I outlined the whole image in black.


And here's what I had after all the paint had dried for 4 hours (as the paint label recommends):


Now for the magic. After painting the image was slightly textured from the way I used the sponge brush, but it was still flat. Then I heated up my iron on the steam setting and held it about 1/2" above the fabric while it was steaming (you have to have steam, just heat won't work). Then the paint puffed up and turned into a whole new texture! I tried to get before and after shots but it's still hard to see. The photo was taken when the paint was still hot and a little wavy. It smoothed out after it cooled.


And here's the final shirt modeled by the lucky (thrilled...) recipient! Other than the drying time in between the different colors of paint this was a pretty fast project.


PS. If you need help finding a kid's character image try out these websites and the coloring pages:

These two sites have both printable coloring pages and coloring related games such as mazes, paper dolls, bookmarks, mobiles and more:
Just coloring pages (check both PBS links for your favorite show because they each feature different shows):