With summer just around the corner I'm getting ready to enjoy to family picnics and being outside again (finally!). I wanted to make a picnic blanket that was waterproof on one side and easy to store so I came up with this design. This would also be great for the beach and keeping the sand out of your blanket! It features a shower curtain or vinyl table cloth on the bottom, a blanket on the top, an attached pocket that the whole blanket folds up into and an easy to carry shoulder strap.
Materials:
- 1 heavy duty vinyl shower curtain with magnets, patterned or clear--mine was 71" x 70" (if you get the type with suction cups on the sides they'll show up in the final blanket). I also tried this with a vinyl table cloth which looked really cute but was not as durable.
- 1 twin XL blanket, washed and dried--the one I used was 92" x 63"
- 45" shoulder strap (or whatever length feels comfortable for you)
- sewing machine and lots and lots of pins
1. Cut off the bottom of the blanket so it is now 73" x 63". You'll now have a scrap piece that's 19" x 63". If you're not using a twin XL blanket you're going to start with a basic rectangle of 71" x 60". Add 2" to each side that will you cut with a raw edge and 1" to each side that you cut with a finished edge because the finished edges you only fold over once in step 3 and the raw edges you fold twice.
2. Trim off the top of the shower curtain and the bottom with the magnets so it's 60" tall (and still the original 71" wide). I took photos but with this being so large a project I decided that drawn diagrams would be more helpful!
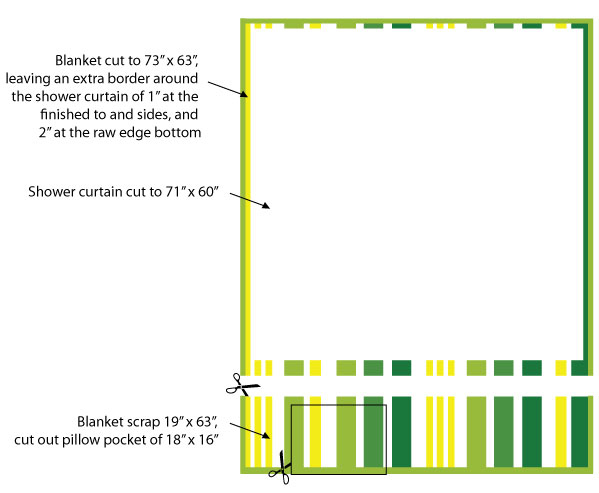
3. Make the pillow piece: Cut a piece 18" wide x 16" tall from the scrap blanket fabric to use for the pillow. One of the 16" sides should be the finished blanket edge (which will be the top of the pillow opening). Hem the 3 raw edges of the pillow by folding the edges over twice, 1/2" each fold. The pillow piece should now be 16" wide x 15" tall. Then fold under the ends of the strap to prevent fraying and sew the strap onto the sides of the fabric.
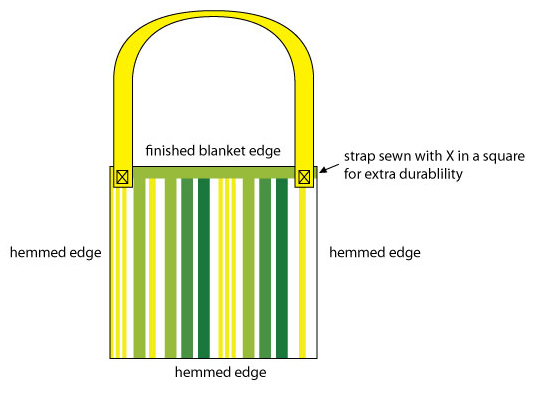
4. Position the pillow in one of the corners of the blanket that has finished edges. Place it 1" away from the edges and sew around the sides and bottom.
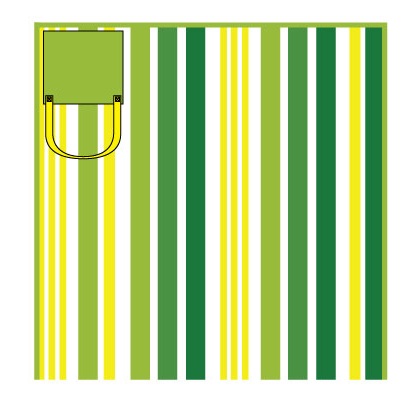
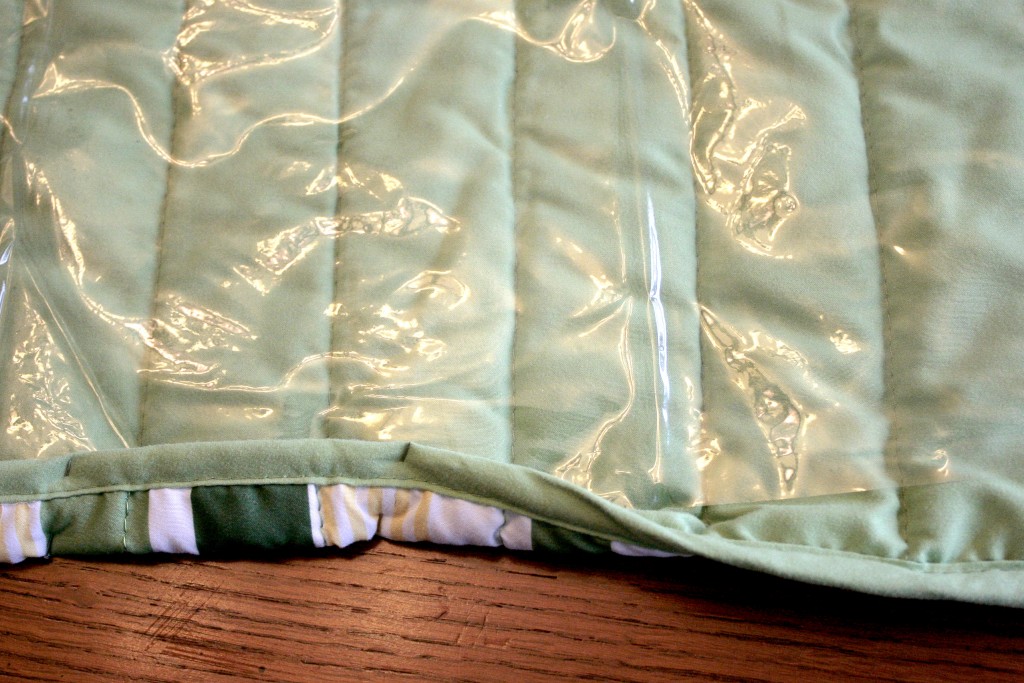
5. Now you have a blanket with a pillow pocket that is 73" x 63" and a shower curtain that is 71" x 60". Center the shower curtain 1" away from the finished top and sides of the blanket and there will be an extra 1" along the raw edge. Fold the extra 1" inch of blanket over the shower curtain and pin down. At the raw edge, fold over twice and pin down.
6. Sew around the entire blanket using a larger stitch to avoid putting too many holes into the vinyl.
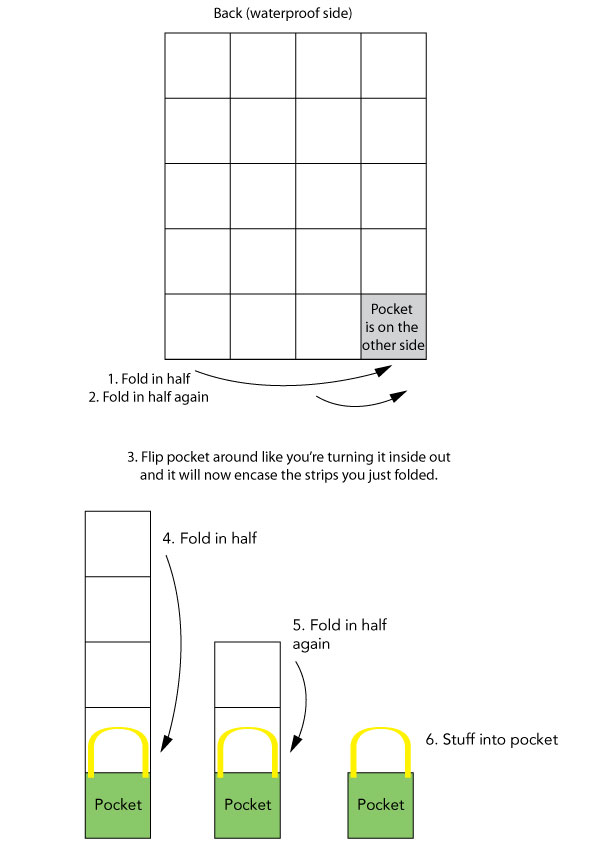
7. Fold your blanket up into the pocket and you're ready to impress everyone at the park! To fold the blanket, lay it flat with the vinyl side up then fold it in half lengthwise, then in half again. Turn the pocket inside out so the strips you just folded are now inside the pocket. Fold the strip above the pocket in half, then in half again, then stuff it in the pocket. Now your blanket is easy to store and carry and even doubles as a pillow!
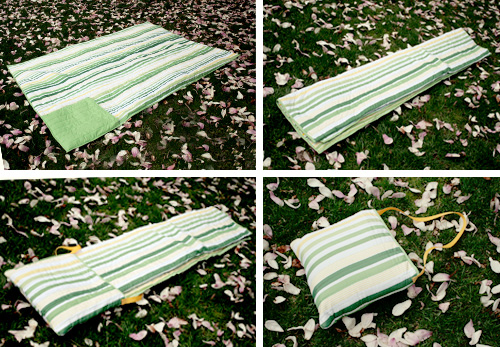
Additional notes:
- When the blanket is open you can hide the strap inside the pocket. The pocket can also double as storage and makes a great spot to stash napkins, disposable plates, and other items that blow away at a picnic.
- If you're not going to be outside on wet ground this would be even easier without the waterproof layer.
- An all fleece version of this would be fun for kids for road trips, a fun and functional pillow to have on the couch, or great for sports fans. It would double as either a seat cushion or a blanket!
- The fluffier the blanket the harder it is to stuff it into the pocket so thinner or single layer blankets work best.
- The blanket would be easier to fold if you stitched along the fold lines. I was hesitant to try this with the vinyl backing because all the holes would make it less durable. But it could be a good addition to a non-waterpoof version.
- Rather than folding the blanket edge over the vinyl side you can also use bias tape. Or you can remove the binding from your blanket then stitch it back on once the vinyl is pinned down. It looks nice but it's a lot of extra work and maybe not worth it, trust me.


