I've had the idea for this pillow for a few months and the pillow contest at
Sew Mama Sew was the motivation I needed to get me going. The inspiration was Anthropologie's Smoldering Hues Shower Curtain.
The ruffles in this pillow are all knit fabrics. I thought this would be a fast and easy project and whenever I think that, I'm nearly always wrong. I had to visit 3 fabric stores to find enough shades in the orange/red/purple range to make this work. Once I finally found all my fabrics the sewing part wasn't too difficult. I used an 18" pillow form and a cotton fabric for the pillow case.
So, here's how we get started. For the front of the pillow you'll cut 7 strips of fabric for the ruffles. Using a rotary cutter, cutting mat and T square will make this a lot easier than scissors. The top ruffle will be 3 3/4" x 36" and the rest of the ruffles will be 3 3/8" x 36". For any of these photos you should be able to click on them for a larger view.
Cut a 20" square for the backing fabric. You can also cut it larger and hem in the sides to 20" if you want to avoid any fraying. Even though your final pillow case needs to be 18", starting with 20" gives you a little extra room in case the fabric scrunches up a bit when you add your ruffles.
To make the ruffles put your sewing maching on the largest stitch setting. If you can reduce the tension without causing problems stitching do that as well. Stitch along the length of each strip of fabric twice, once 1/2" down from the top and again 3/4" down from the top. You will be removing these threads later in the process so you don't have to be too precise. Tightly hold only the top or bottom threads (whichever works more smoothly for you) and start scrunching your fabric toward the center. Do this from both sides and scrunch until the length is 20". Repeat for all 7 strips.


Next, mark the backing of your pillow where each ruffle will be stitched down. The first ruffle is stitched 3/4" down from the top of the fabric. Every other ruffle is down 2 9/16" from there but I was nice and did the math for you so see the diagram below. The ruffles should all be lined up along the left side, I just moved them over in the diagram to make it easier to see. The darker border is the seam allowance area. If you're having trouble seeing the measurements, measuring from the top down you'll mark a seam at 3/4", 3 5/16", 5 7/8", 8 7/16", 11", 13 9/16", 16 1/8" and you'll have about 1/4" of the ruffle below the seam:

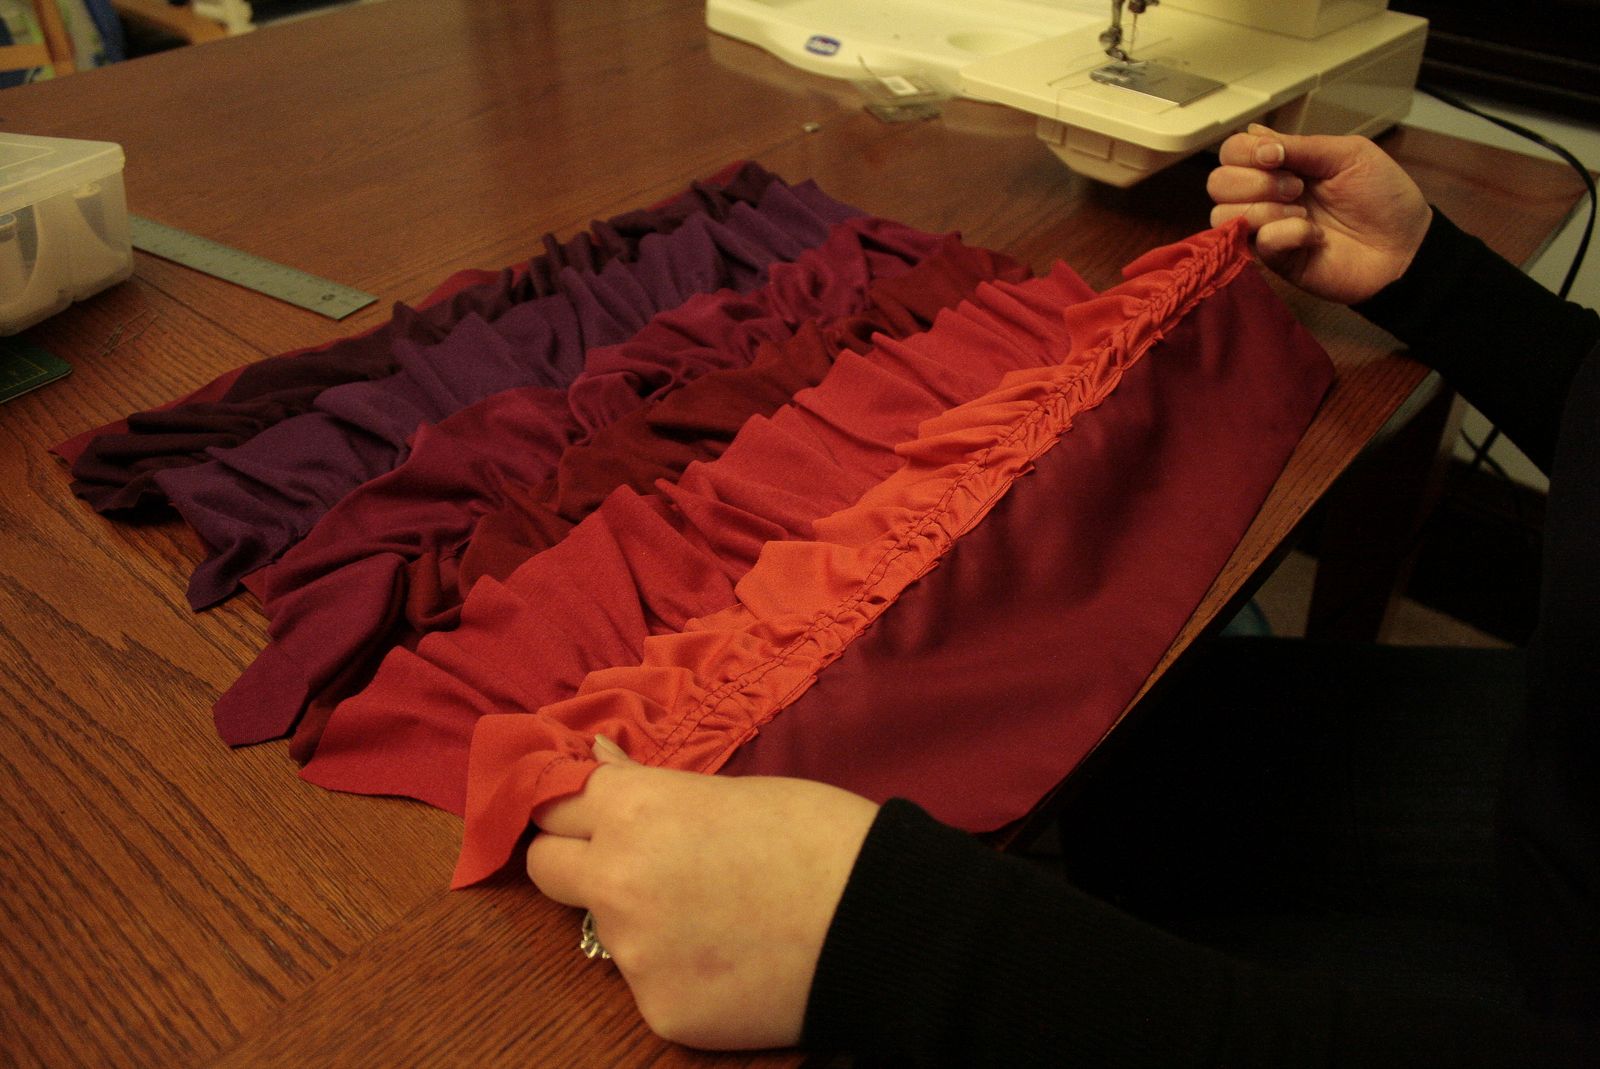
You'll start with the top ruffle (the orange in my case) and work your way down. To have a nice finished top so you don't see the stitching you'll actually be sewing along the bottom of each ruffle. Then you'll fold them all down so the rows of stitches are hidden under each ruffle. I found it easiest to first sew one direction as close to the top of each ruffle as possible even if I missed a little of the fabric. Then I stitched the other direction 1/8" below my first seam. Here you can see how the stitches looked on one of the purple ruffles and then the finished edge when it was folded over.
Below is how the back of the fabric looked like after all the ruffles were added. You'll see that the fabric did scrunch a little so I was glad I gave myself 20" to work with!
After stitching down each ruffle pull out your loose stitches that you used to make the ruffles. For me some pulled out easily and some took more effort. Just don't pull too hard and damage your fabric!
For the back I did an envelope opening hidden by two ruffles. I cut two rectangles, 19" wide x 12.5" tall for the top piece and 19" wide x 10" for the bottom. I hemmed the edge that would be showing (1/2" folded twice) and added a ruffle using the same method I used for the top. If you're having difficult seeing the diagram below, the top orange ruffle is stitched 3/4" up from the bottom of the hem. The bottom purple ruffle is stitched 2" down from the top of the hem.
To finish it off, lay the pillow front down with the ruffles facing up and make sure that the bottom of the lowest ruffle is at least an inch away from the bottom so it doesn't get sewn in. On top of that place the top of the back (with the ruffles facing down). Lastly, place on top the bottom of the back so that it overlaps the top piece by 1 1/2". Then measure and mark if necessary an 18" square. Finally, smooth out all the edges of the ruffles and stitch around all 4 sides.
Then trim off any excess, flip it right side out and put the pillow in!
Here's the finished back:
If anyone makes this pillow using my tutorial I'd love to hear any feedback you have. And don't forget to send me a link to your finished project!
I'm linking this project up to Pillow Fight for a Cause. It's a great project where you can donate homemade pillowcases to kids in hospitals!
PS. Also check out my friend
Lindsays's pillow. It's a great idea to help you keep track of those constantly disappearing remotes!